12 Days of Boudoir Poses
General
3 years ago
We are in the holiday spirit and wanting to spread the wealth… of creativity we have!
For the next 12 days we will be sharing 12 ways to use one pose on our social media pages and in this blog! These posts are for both fellow boudoir photographers get creative with their boudoir poses and for our bombshell clients/prospective clients feel like they can nail any boudoir pose.
For Photographers
12 Days of Boudoir Poses is to show you how to squeeze every ounce of art and quality out of a single pose:
Don’t waste a pose with only one clean shot. There are so many variations from hand placement, facial expression, leg placement, where you are shooting from, what’s in your foreground etc. The same pose can be used multiple ways and the benefits are endless. It provides your client with a variety of selection, it helps you tell a beautiful story in your fine art albums, and if a client doesn’t love one of the variations chances are they love another! So no pose goes to waste! Remember, what you love might not be what your client loves, variety helps them feel taken care of. However, it is also imperative to listen to how they feel in the moment, and how they feel about what they see on the back of the camera! I NEVER have clients who select the minimum number of images included in their collections, which tells me I did my job, because they HAD to have more!
Remember, what you love might not be what your client loves, variety helps them feel taken care of. However, it is also imperative to listen to how they feel in the moment, and how they feel about what they see on the back of your camera!
For Bombshells
12 Days of Boudoir Poses is to show you that we will take great care of you during your session and walk you through every bit of posing for your entire session!
This is not an episode of ANTM (America’s Next Top Model for those of you who didn’t binge ANTM during winter break in the early 2000’s) where I sit back with a camera and assistant expecting you to “perform” for us, know all of your angles, and have a myriad of poses prepared. And we definitely won’t just whisper passive aggressive comments to each other like “I’m bored”, “Does she feel good about that?”, or “Is this all she has”. Ugh so cringe. We are here to make you feel comfortable and even more so CONFIDENT! We will demonstrate the pose, play the mirror game, AND show you the back of the camera so you know you NAILED the pose ;)
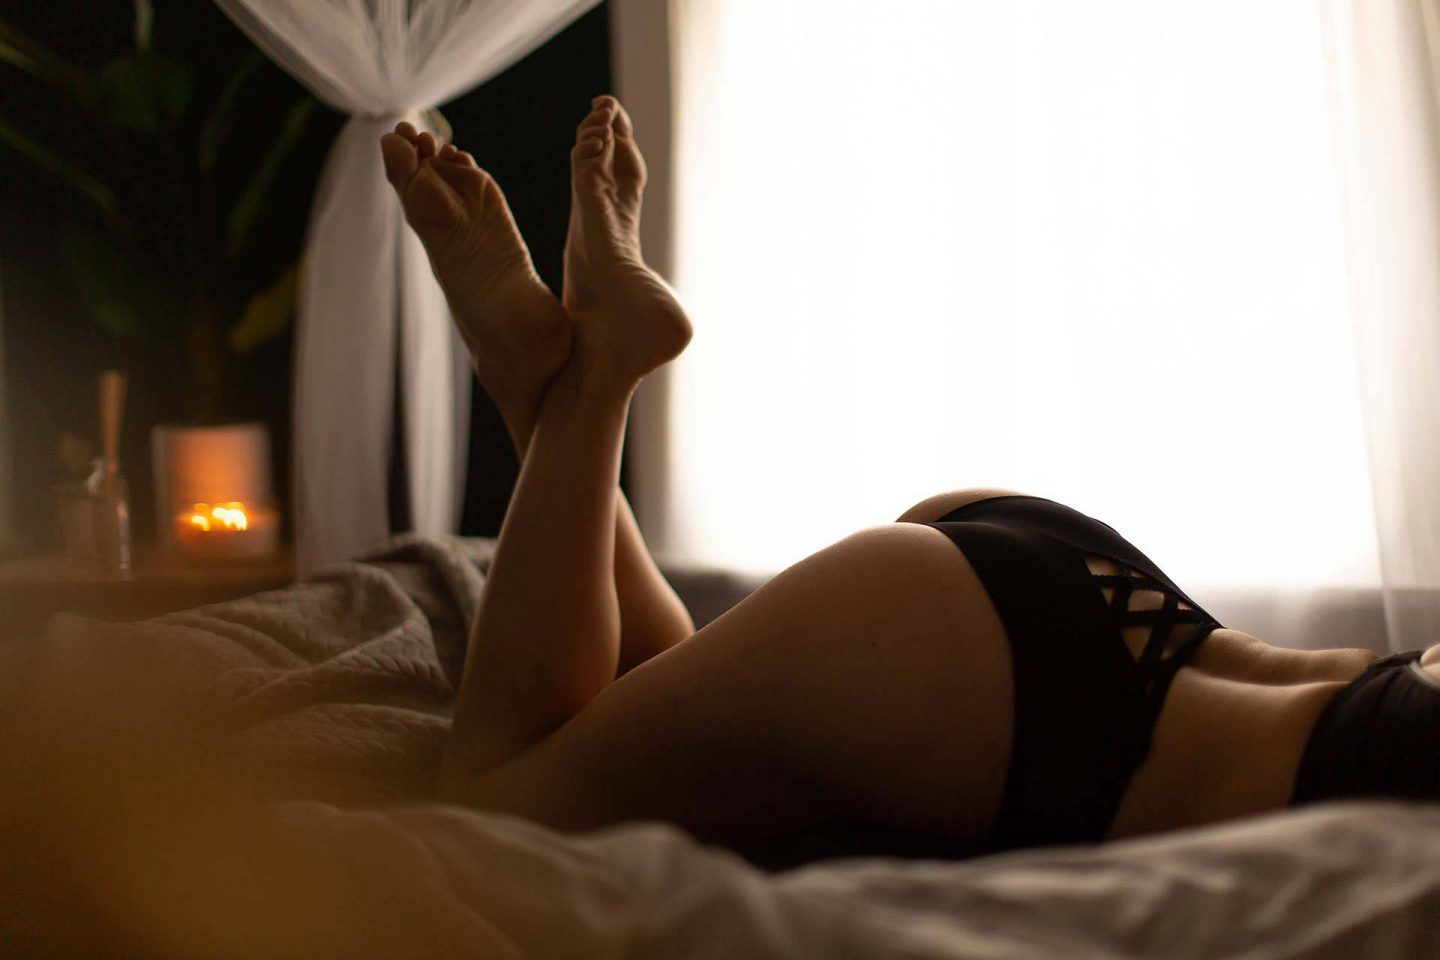
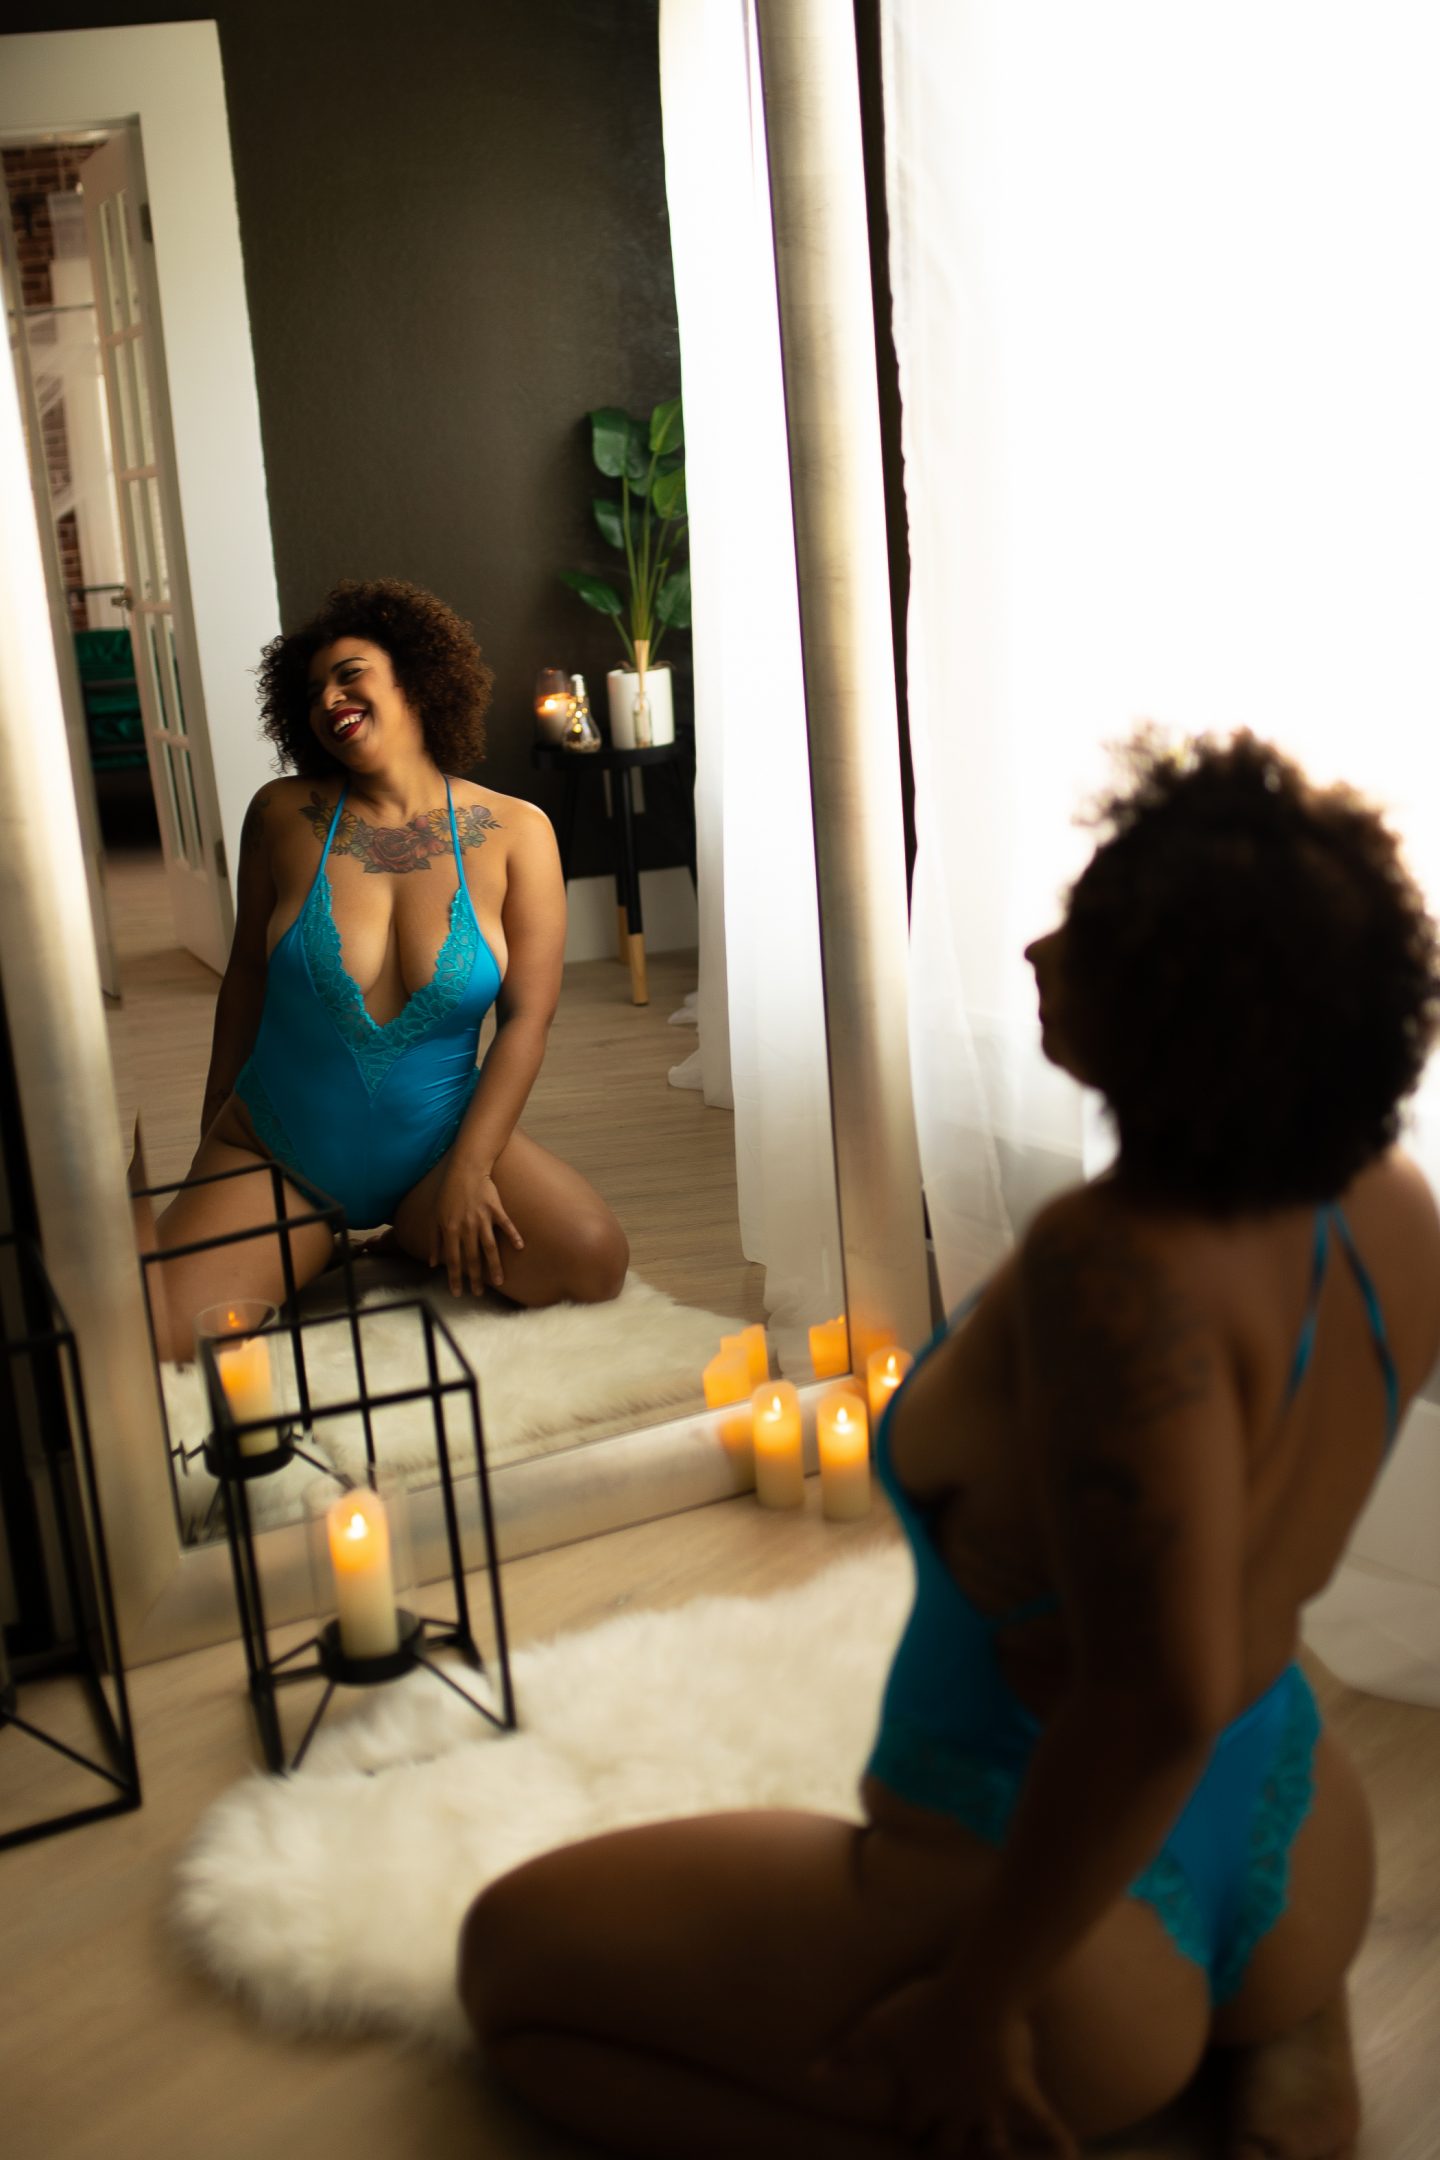
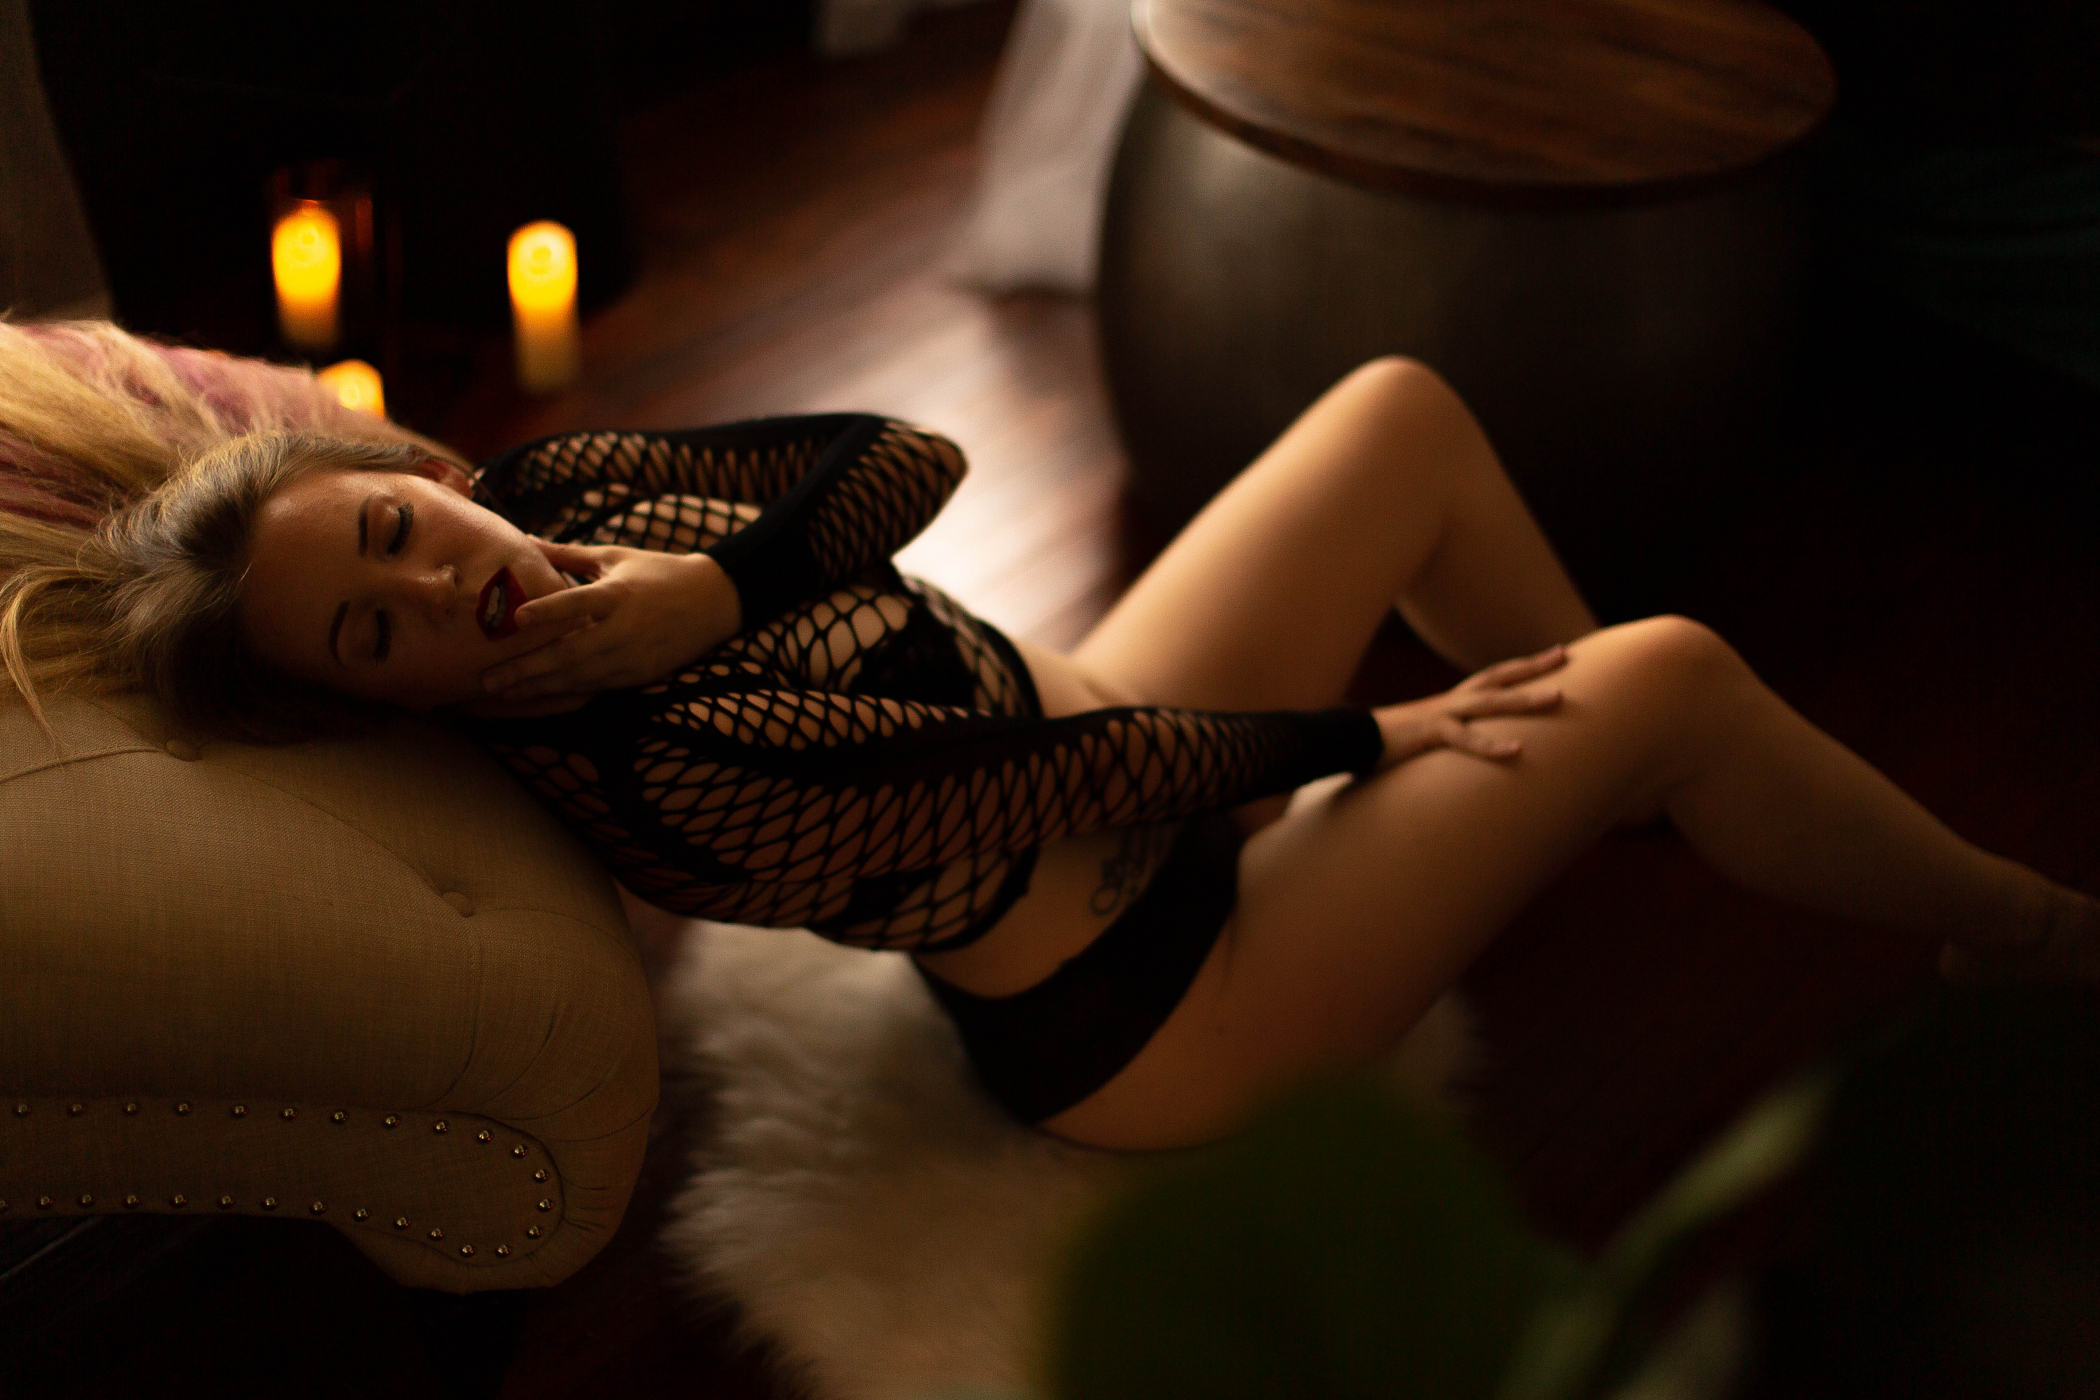
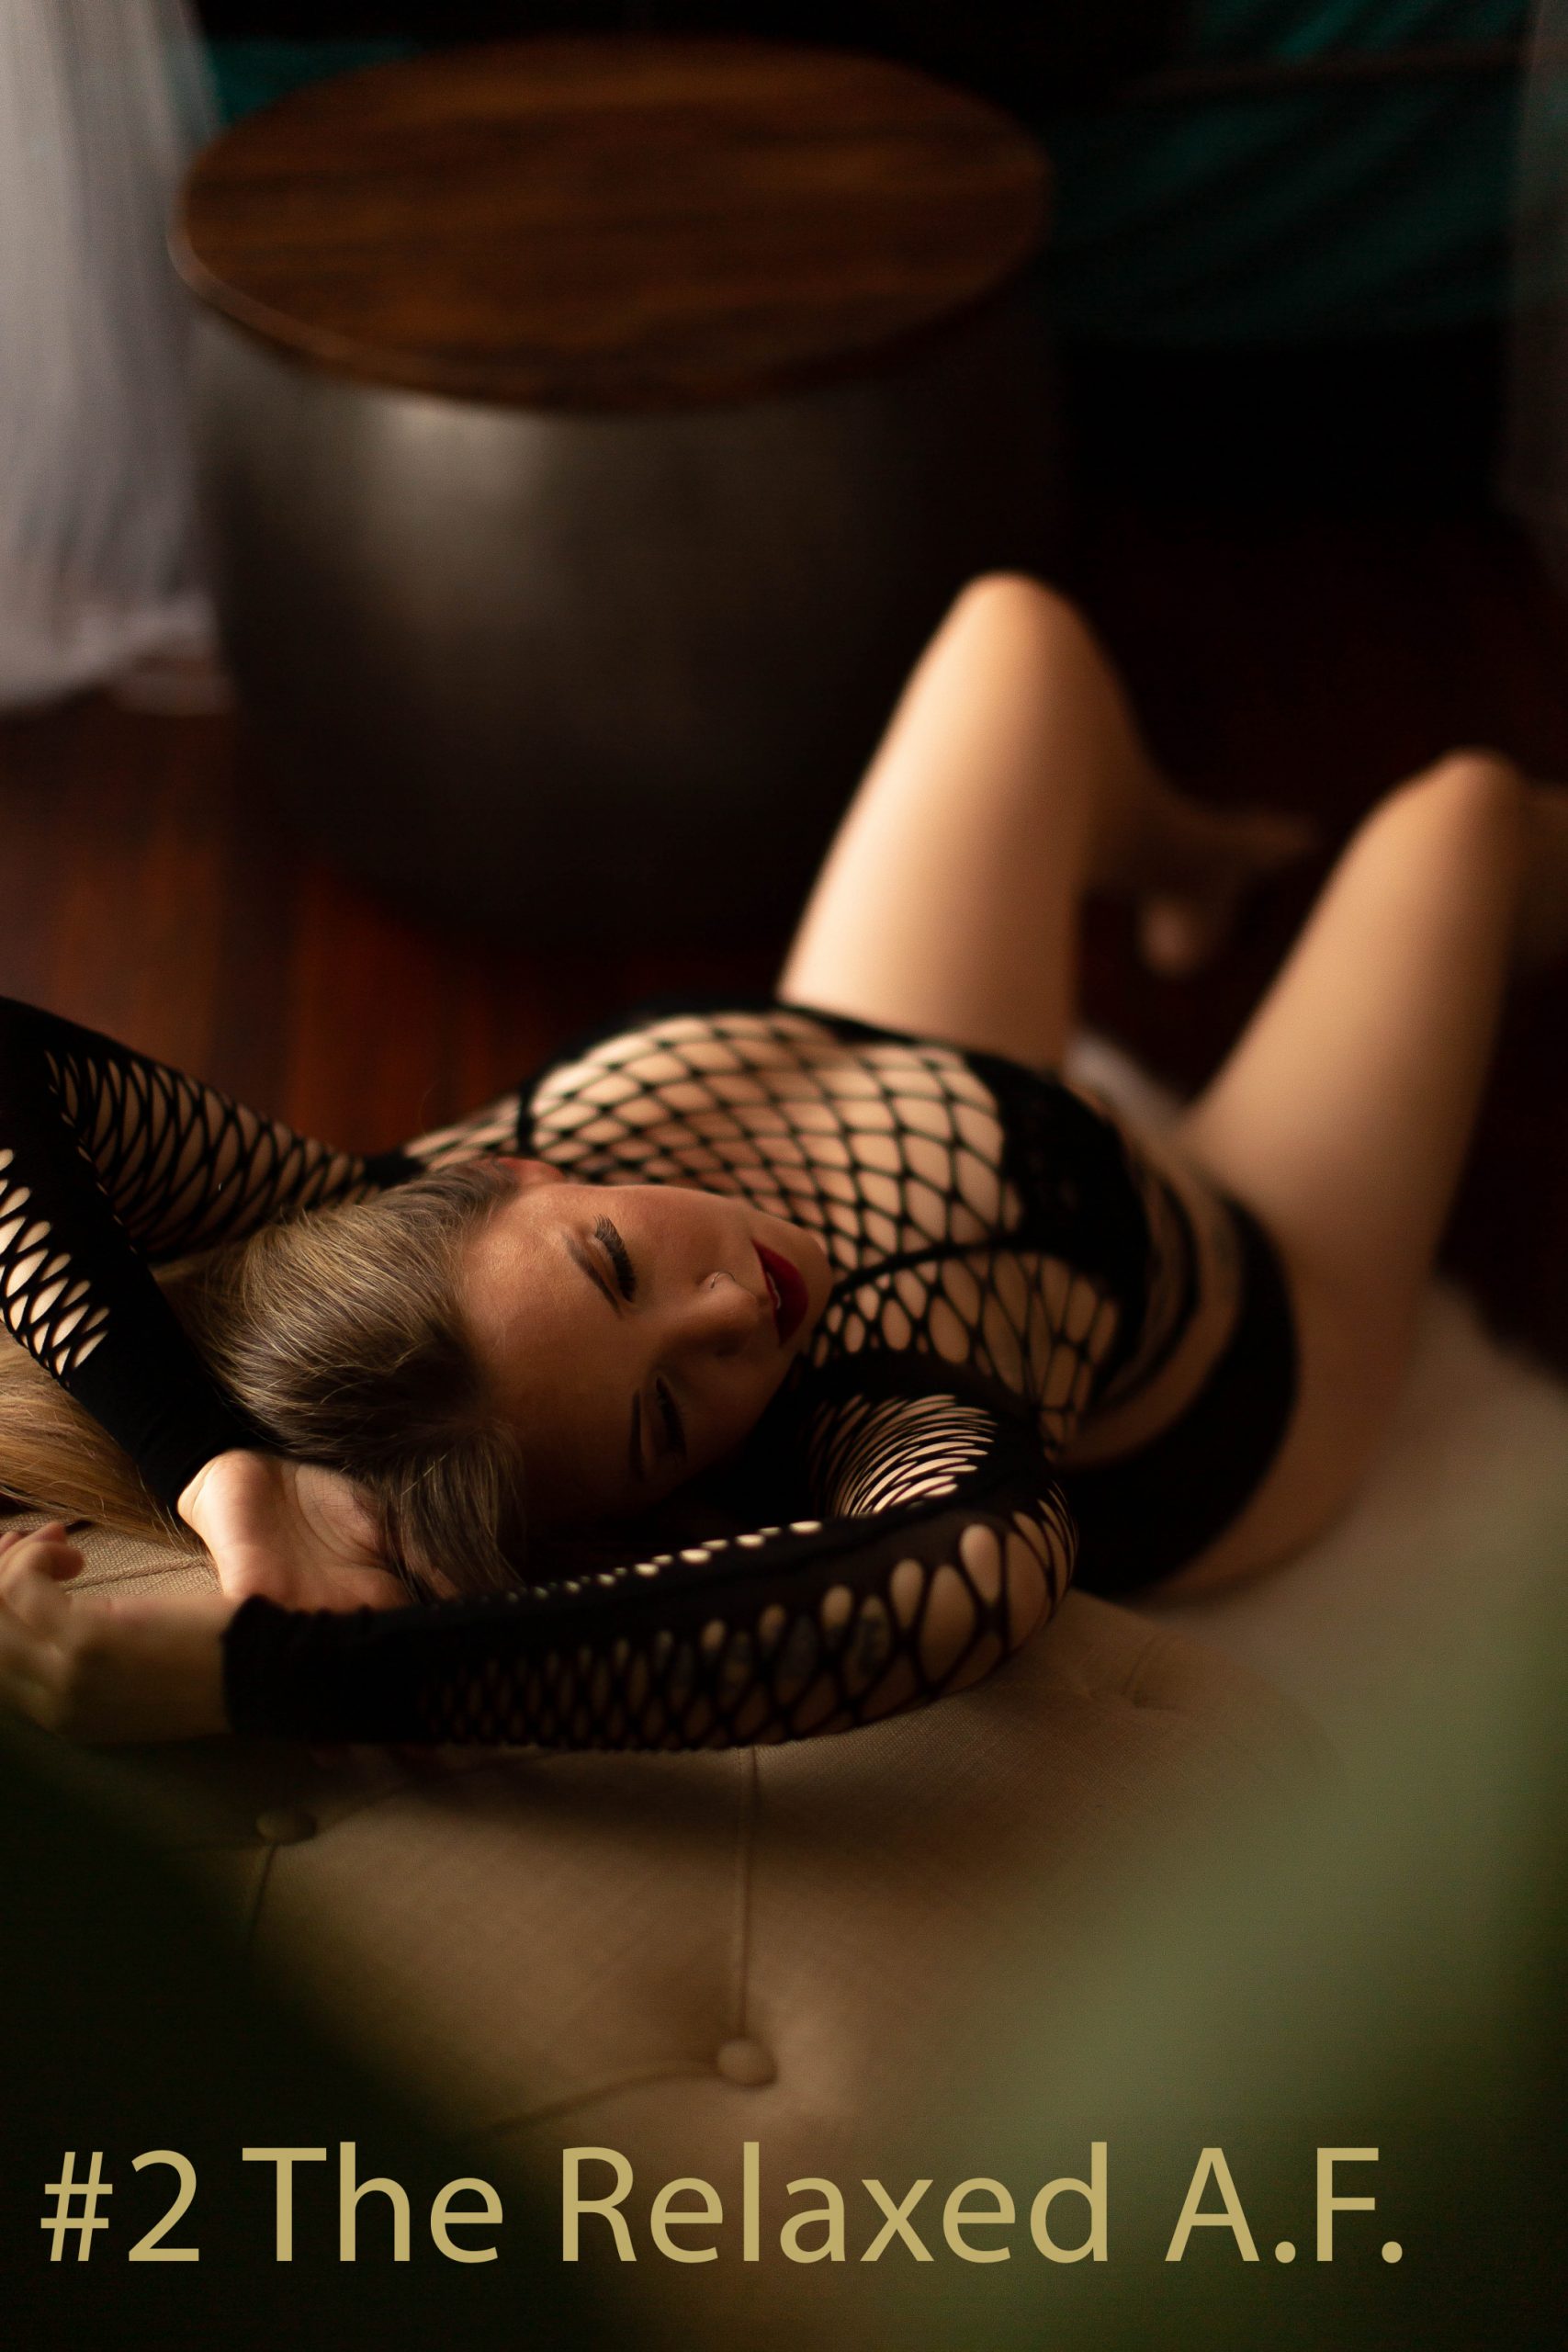
Boudoir Pose #1 The Relaxed A.F.
This pose, The Relaxed A.F., will be our jumping off point. We will show six variations of this pose, shot from two separate angles. We actually found 30+ total variations, but 12 should do the trick!
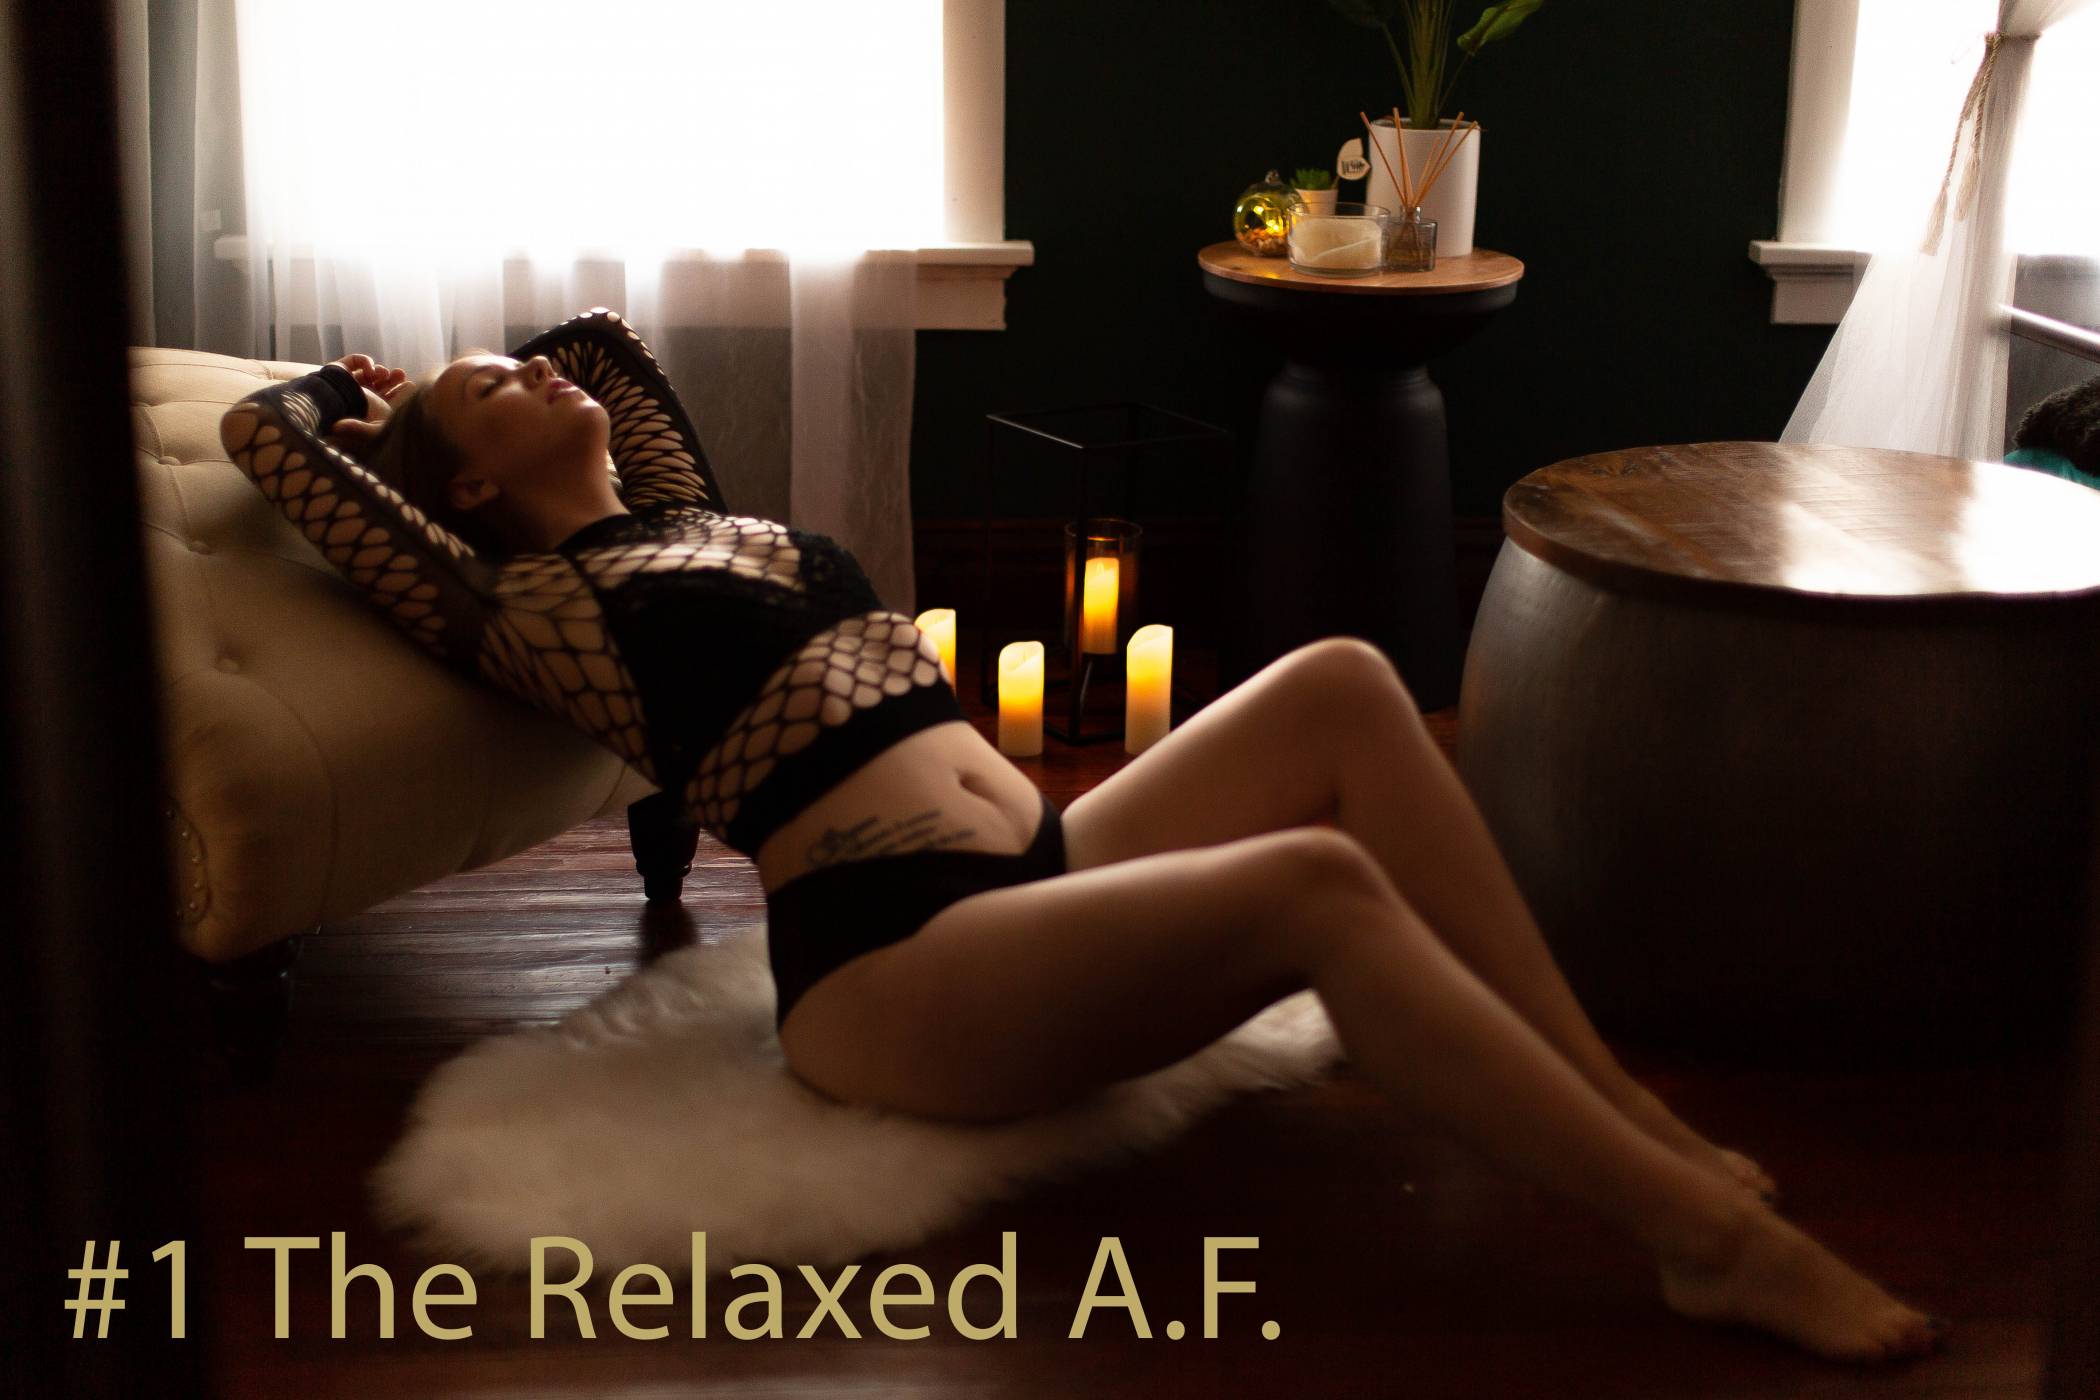
This pose is easily achieved with the edge of a chaise lounge (as pictured), however, you can also utilize a chair, bench, the edge of a low bed etc. It is one of the reasons we feel this pose is so versatile. There are several aspects of this pose to take into consideration when posing your client.
How to achieve this boudoir pose!
Elongate the legs by having them lead our eyes out and to the bottom of the frame. Having your client’s toes pointed naturally tones the muscles in the legs, and adds an extra inch or two to their feet. Furthermore, have your client pop the leg closest to you, but not more than the one furthest away. You will get light hitting the top of their leg creating a nice highlight, however the slight extension of this leg also elongates their torso, creating an overall lengthening effect.
Arching the back is easy to achieve and instruct with this pose as the arch naturally occurs by having your client “lounge” backward onto the edge of the chair. To create more or less arch (depending on the comfort level of your client) have them move their tailbone closer to or further from the chair respectively.
Moreover, the higher their chin, the better! This elongates the neck and creates a beautiful highlight leading from their face, down their neck, onto their décolletage. It is extremely flattering and striking. Having their eyes closed looks more natural and relaxed in this specific version of the position, and gives us opportunities for some variety later.
Have the client breathe in through their nose and out through their mouth before each shutter click! This drops their chest and stomach, relaxes their facial muscles so you won’t have any accidental tension, and creates a very natural and sensual lip pout.
Always be cognizant of your client’s comfort level!
Finally, and most importantly, it is actually quite difficult to throw your arms back over your head! This pose is called the Relaxed A.F. but that is mostly an illusion. Be very aware of your clients comfort level with this arm posing. Some clients will be able to completely open their shoulders and stretch their arms all the way back. Others will be able to clasp one wrist with the opposite hand. While some might feel most comfortable grabbing their elbows with their opposite hands.
Helping your clients feel comfortable will ALWAYS bode well with making a pose look natural, keeping their face relaxed, and boosting their confidence! You never want a client to feel like boudoir might be off limits for them because of posing. It is your job to read the room and make the necessary adjustments.
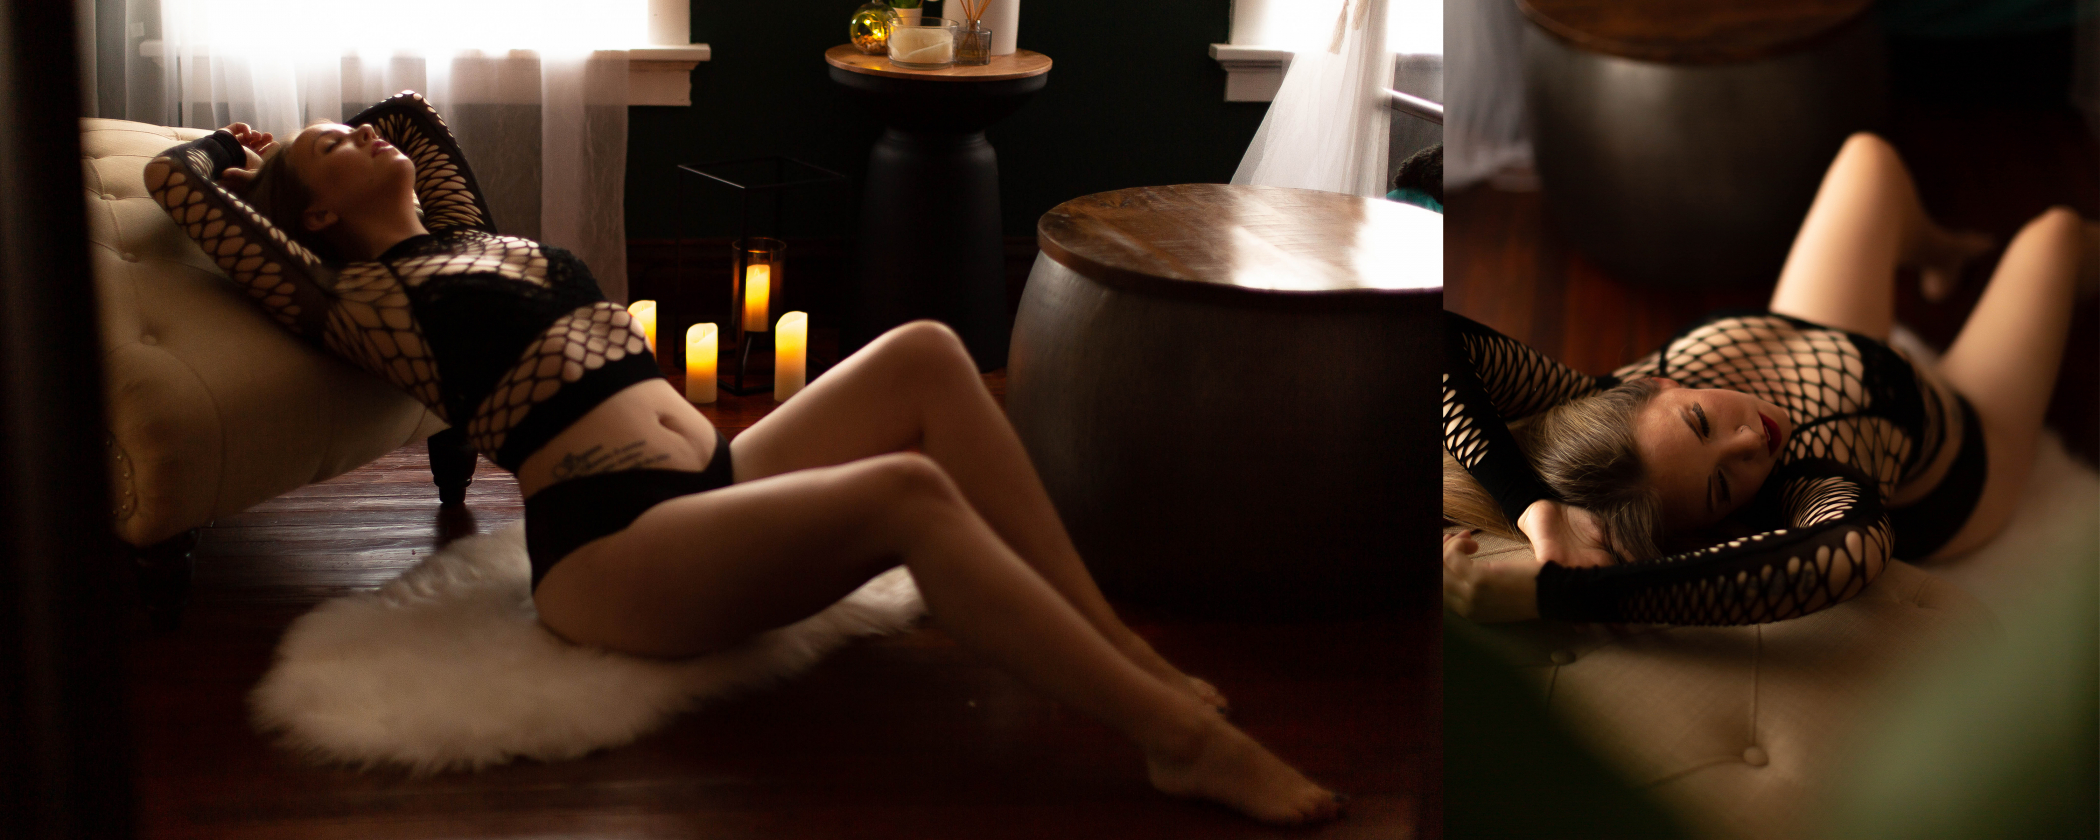
Boudoir Pose #2 The Relaxed A.F.
Three subtle changes create a dynamic new image coordinating with the first, creating an opportunity for a beautiful album layout! The only change we made to this boudoir pose was to have our client turn her face away from the light source for a softer more natural pose when shooting from a different direction. Because we have not moved our client’s body the light is still hitting her in the same places, so our highlights coordinate and create continuity.
This gives the effect that the viewer is able to step into the image and walk around the model!
We made two simple but obvious changes to the image aside from the client tilting her face. We moved behind the client for a new viewpoint, and consequently have something new in the foreground. This gives the effect that the viewer is able to step into the image and walk around the client!
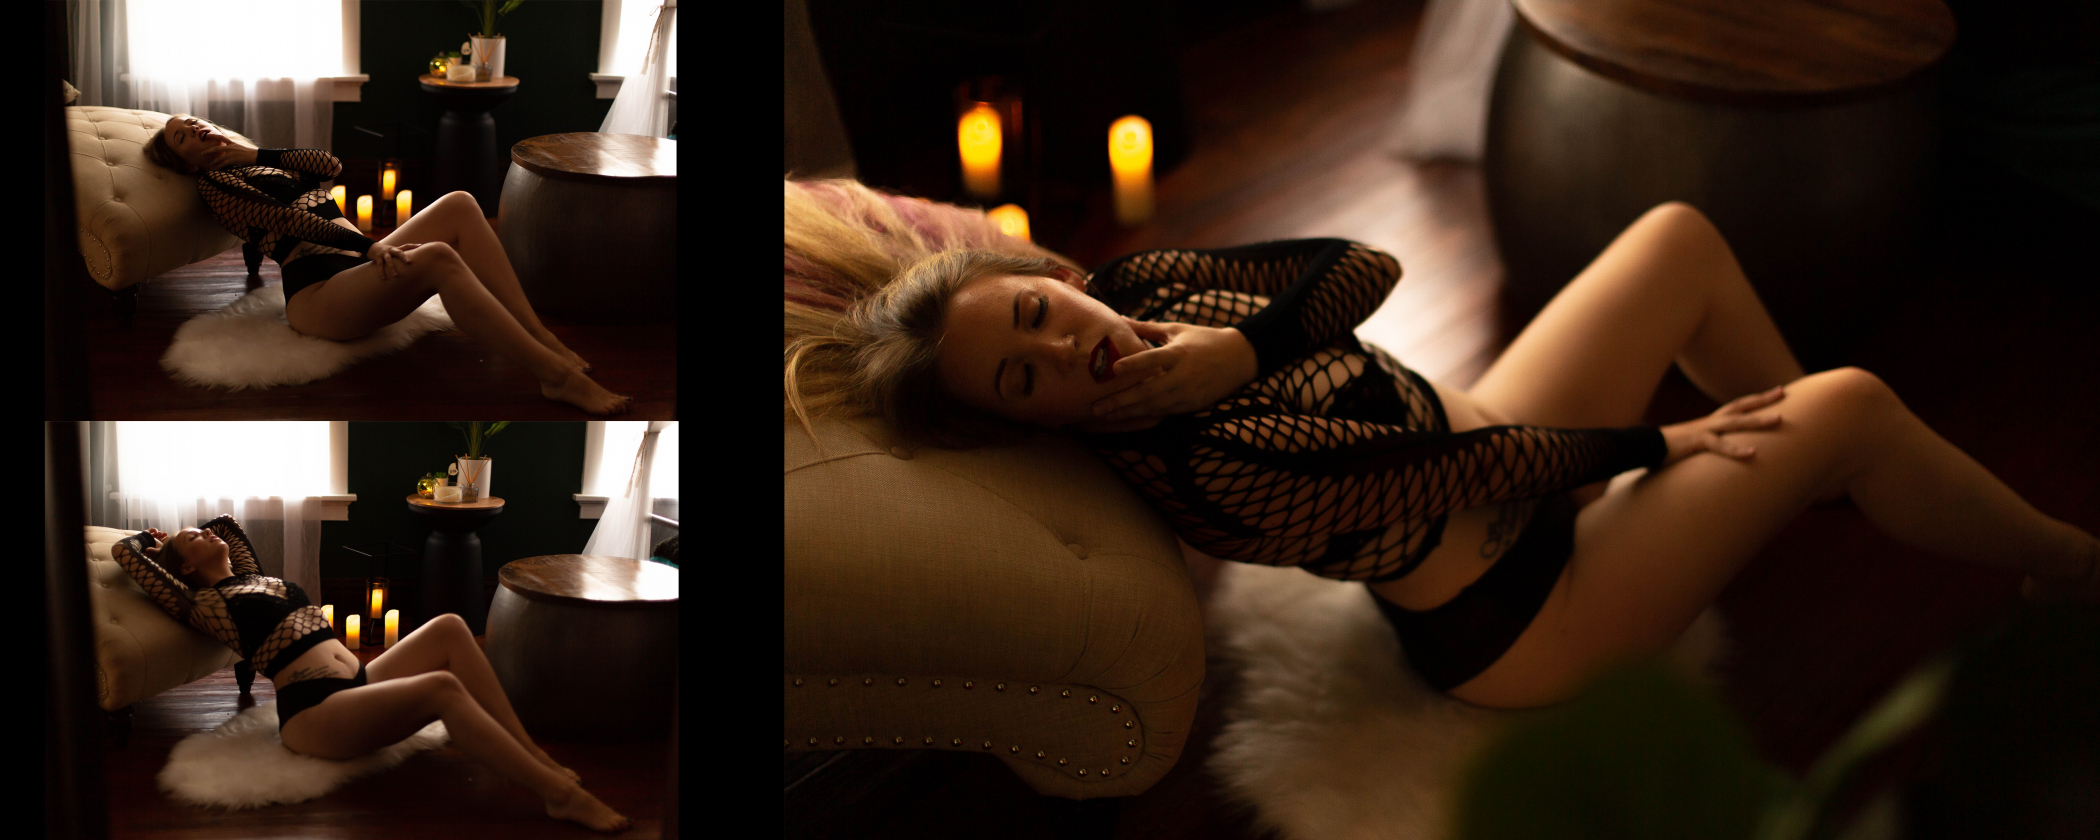
Boudoir Album Spread Layout
Boudoir Pose #3 The Feelin’ Myself
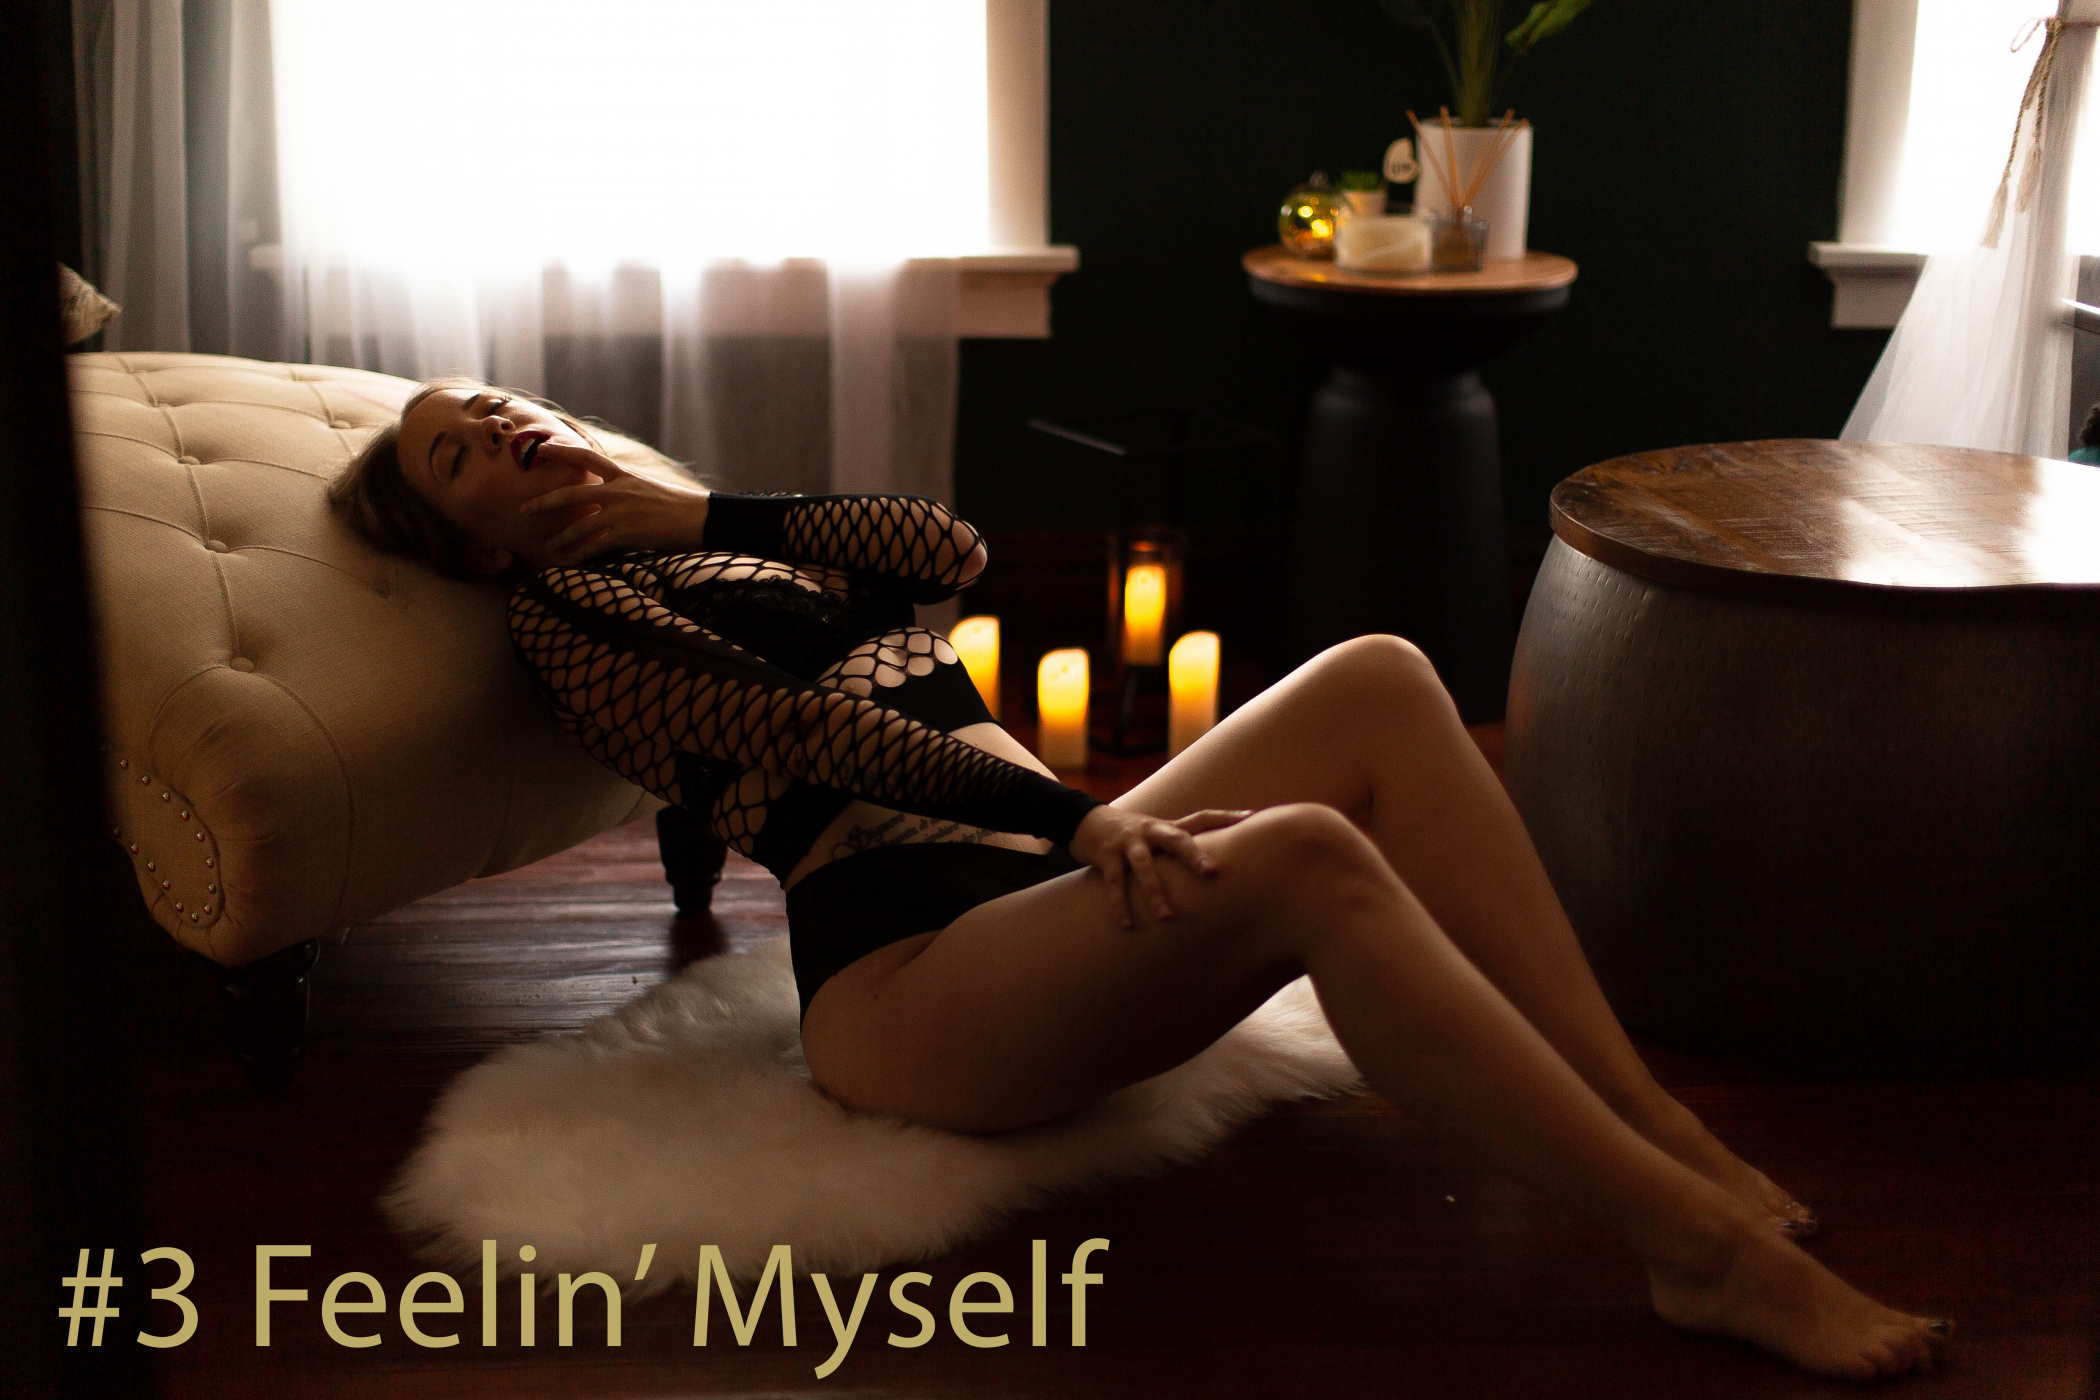
Time to start adding some drama! This boudoir pose variation is likely to be a favorite, it is more comfortable, and easy to achieve. In our experience, this pose makes women feel powerful and sensual, and they are often surprised by themselves in the photo.
There are several versions of hand placement that work well for this pose. One hand clasped around the neck with wide fingers, the same hand placement but with a finger lightly pulling down the lower lip, or a hand with wide spread fingers placed on the décolletage. All are beautiful and we recommend trying all three.
For the second hand, we recommend using a body trace. This creates quick variety, and often movement makes poses appear more natural. To achieve this, have your client place a hand on their knee, and slowly drag their hand (with wide spread fingers) down the outside of their thigh, keeping their shoulder rolled back and elbow tucked in. We explain this to clients by asking them to imagine a string is attached to their elbow pulling it directly backwards. This will help you to avoid a chicken-wing effect and loss of proper posture.
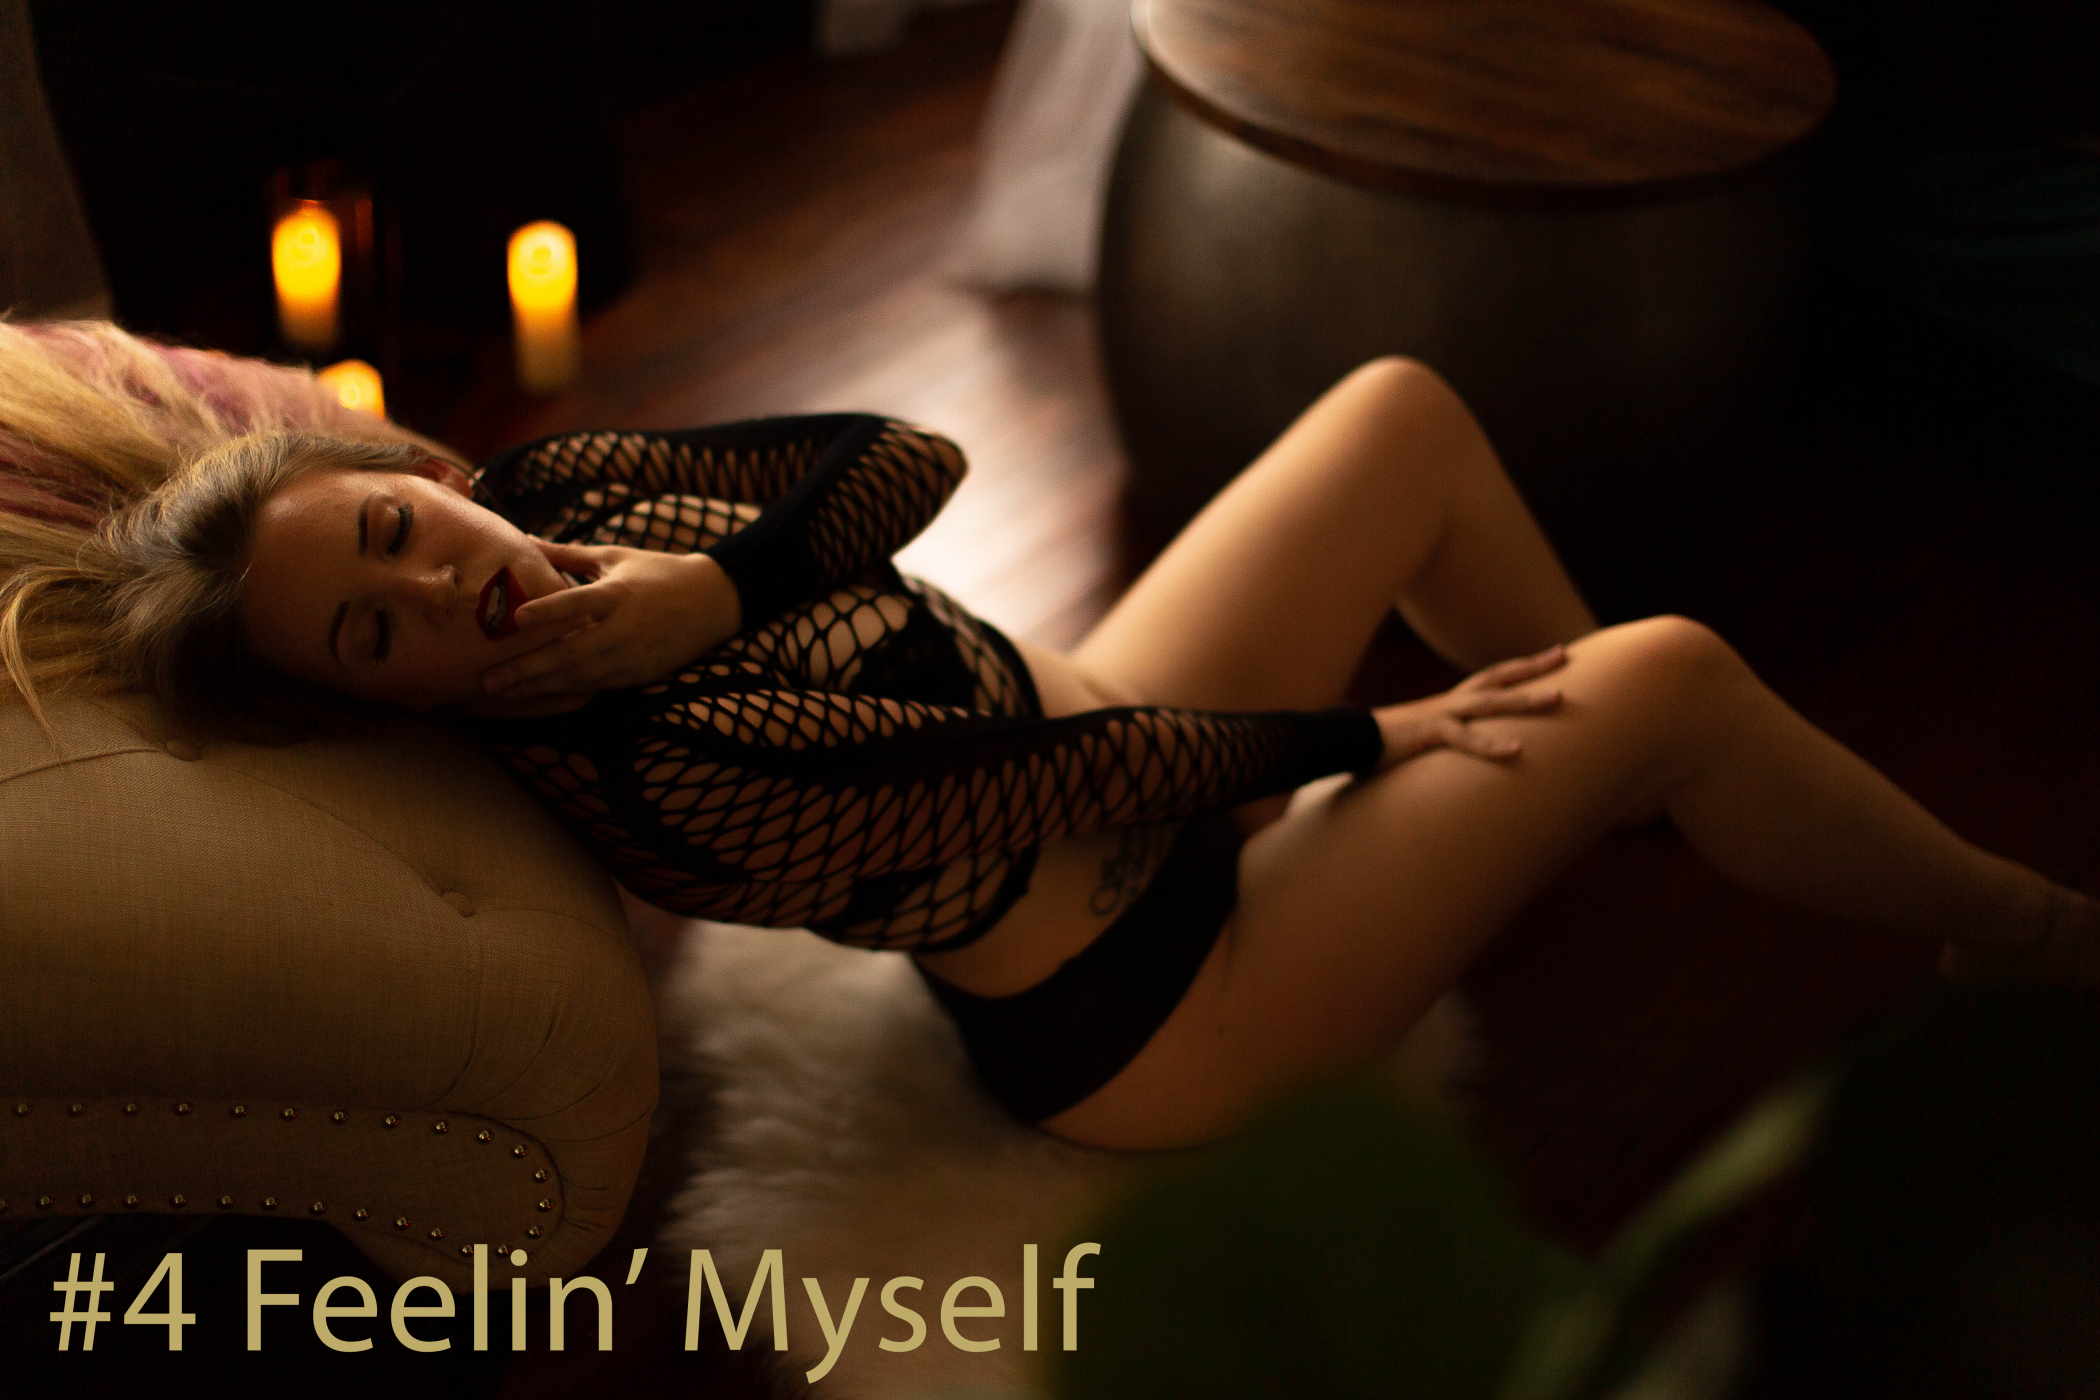
Boudoir Pose #4 The Feelin’ Myself
Boudoir Album Layout
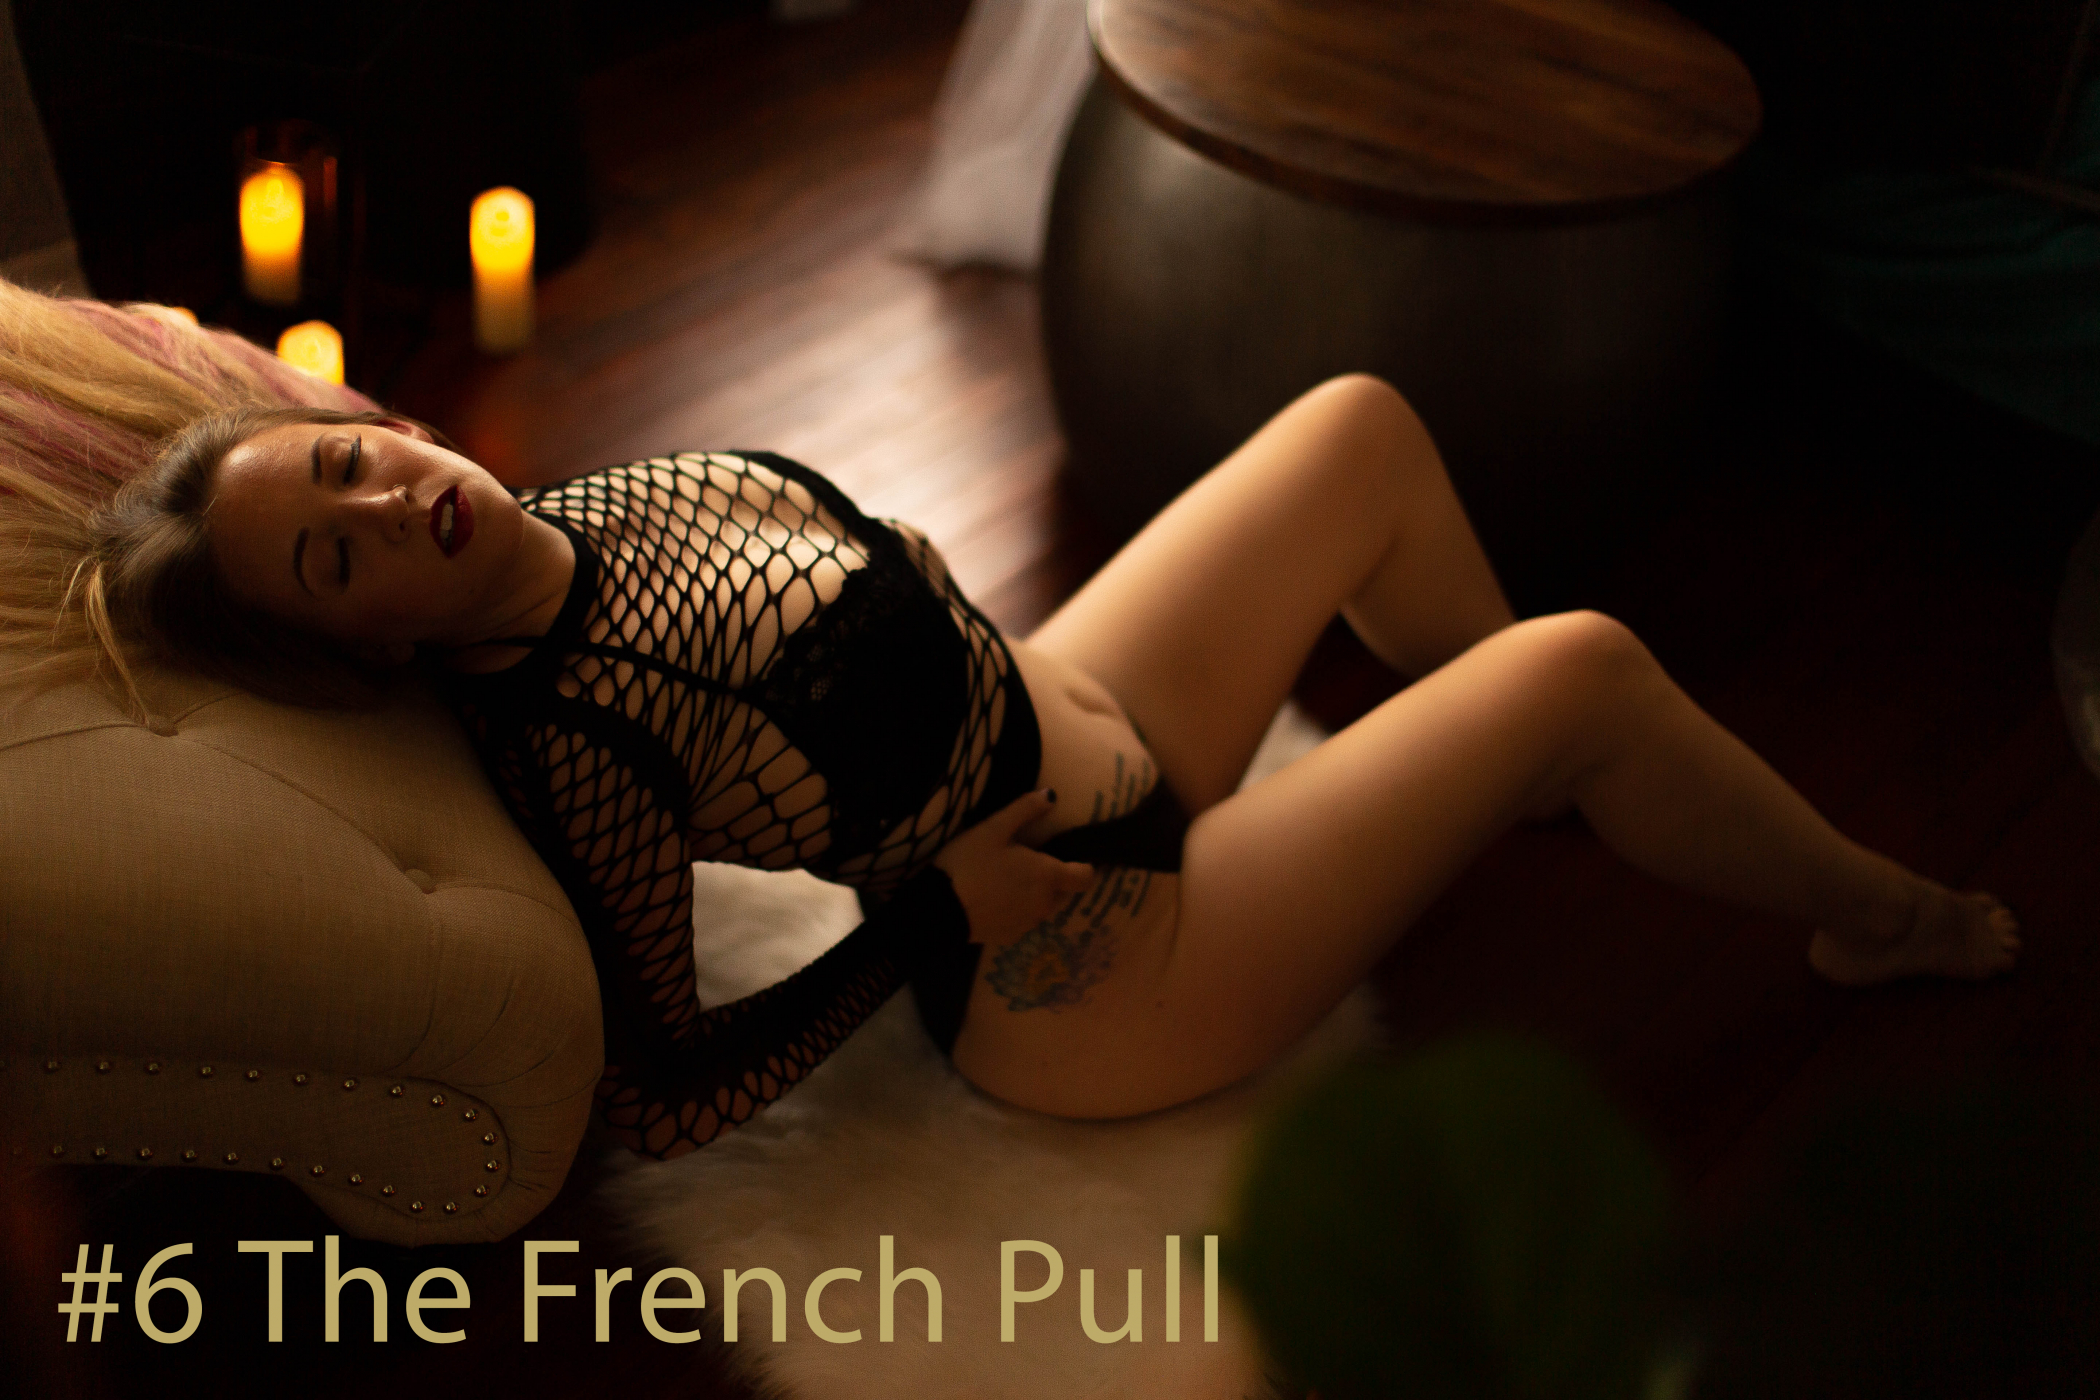
Boudoir Pose #5 The French Pull
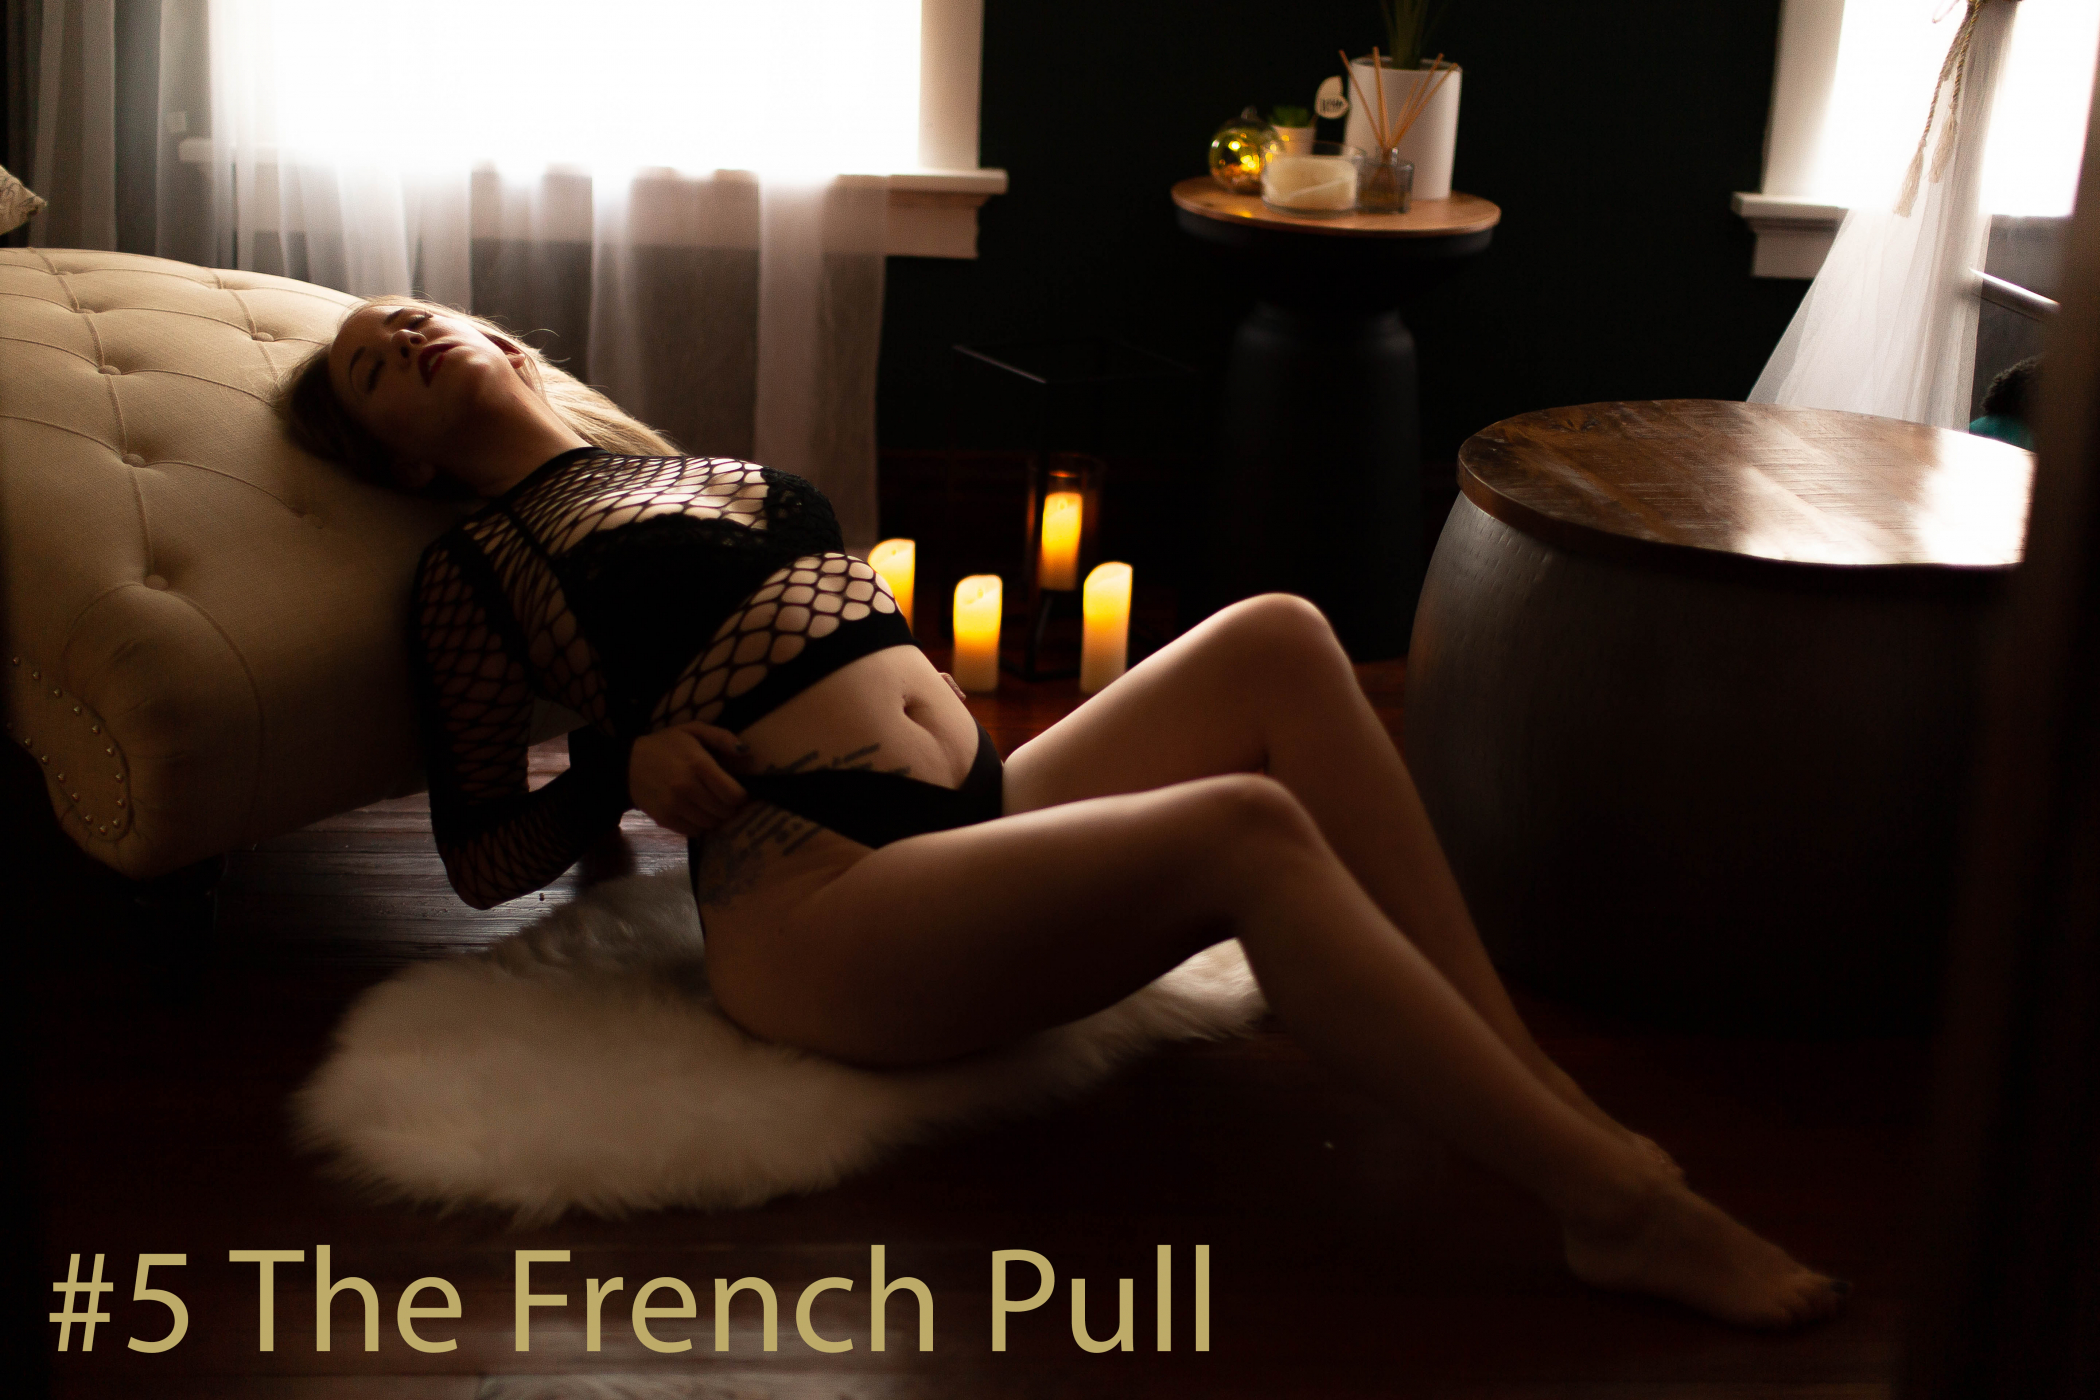
The Boudoir Pose The French Pull is one of our favorite pose variations and can be applied to pretty much any boudoir pose! It also makes for great detail shots, and is one we recommend shooting from multiple viewpoints and depths. The name may seem self-explanatory, but just in case its not… we named this as such because you are creating a French Cut panty line by pulling upwards on the thighs of your attire. The French Cut is wildly flattering on all women. It elongates the leg, exposes the hip, and in our humble opinion, makes women look powerful. Don’t mess with a woman who rocks a French Cut, she knows herself!
In achieving a French Pull, as usual, make sure your client keeps her elbows and shoulders tucked back. These two important aspects will help them hold proper posture, and avoid chicken wings.
Finally, for a little extra sultry, have your client breath in through her nose and out through her mouth with a deep breath. This will sink the chest and stomach, and create a natural lip pout.
*Pro tip, ask your client to simultaneously lift her chin as she breathes out. We know it’s a lot to coordinate, but the results are breathtaking (pun intended). And, if it wasn’t a lot to coordinate, they would be at home in a mirror taking selfies with a cell phone.
Boudoir Pose #6 The French Pull
Did you know the secret to perfect boudoir poses is creating triangles? Well you do now. And there are so many triangles in this pose we can hardly keep track. This pose is as close to perfection as it gets! Notice as your eye moves through the frame all of the triangles created by the body of this model and that these triangles are the parts of the image we want to look at most. They are the parts of the image that make the model look curvy and feminine. Moreover, a is triangle created between our light source, our model, and our lens. This gives us the perfect lighting to create deep contrast of highlights and shadows. Since you have followed us through to day six, we are comfortable sharing our true secrets with you. In real-estate the saying is Location, Location, Location. Well in Boudoir Photography, the saying is Triangles, Triangles, Triangles.
Boudoir Pose #7 The Self-Love
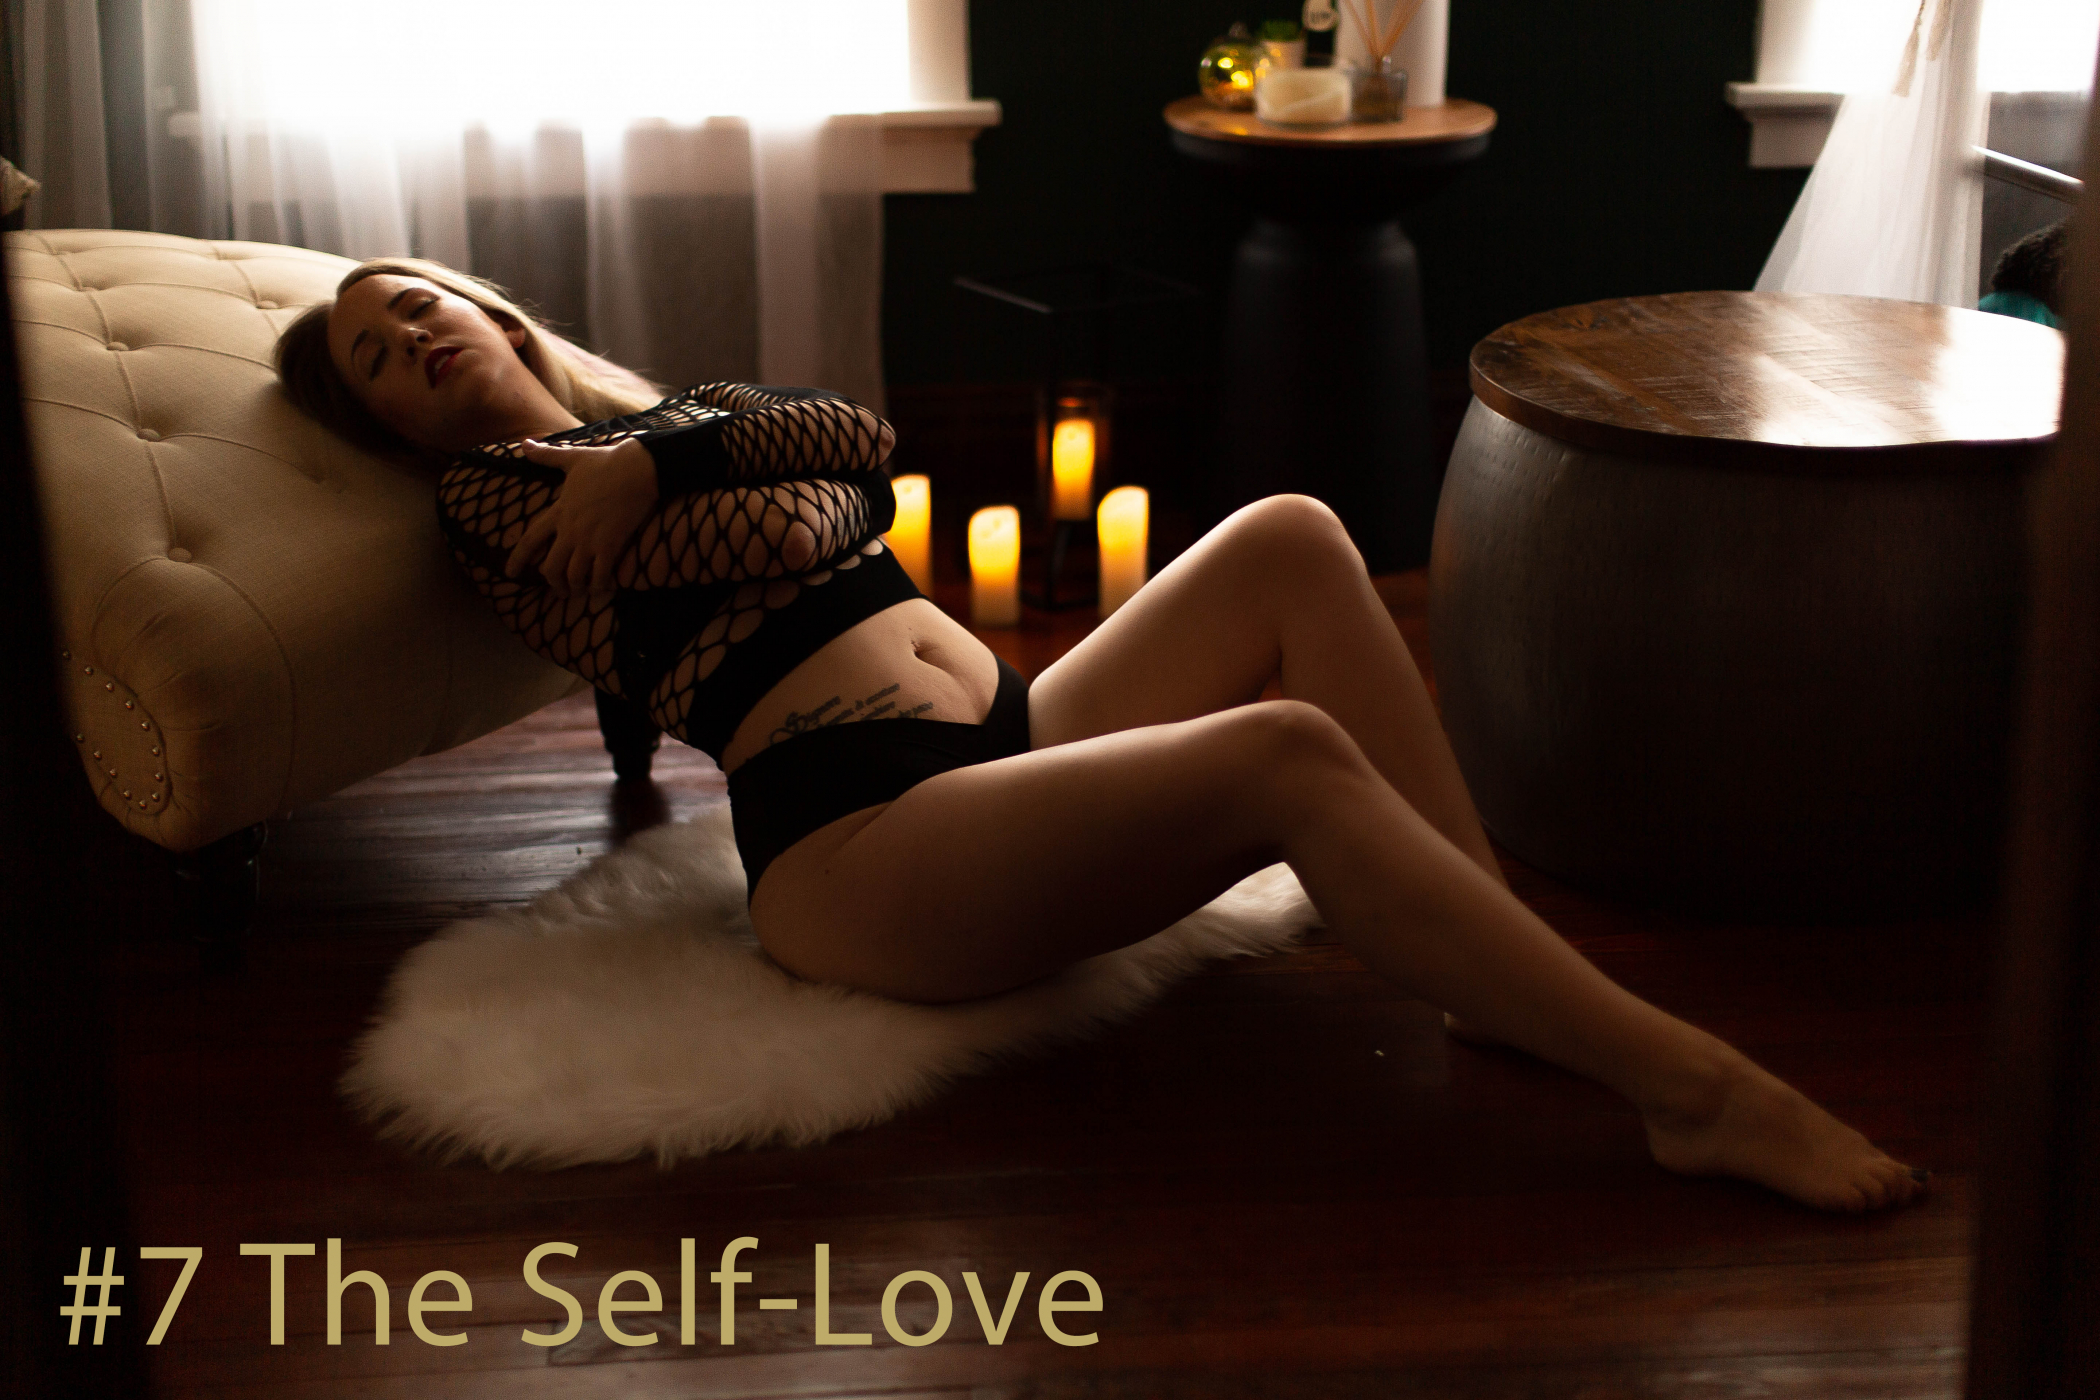
Let’s keep this one simple, if you have made it to day 7 you have learned a lot about boudoir poses with us, and how to make them versatile. So today, in keeping with Self Love, we are going to give you a simple change, an easy pose, and very little direction. The great thing about Self Love is that it can be achieved by nearly any body and can be easily adjusted to flatter women’s bodies in different ways. Your client can either position her arms be used as a “shelf” to support her bust, or lay them across her chest to create the oh-so-sought-after “side boob”. That’s all for today!
Boudoir Pose #8 The Self-Love
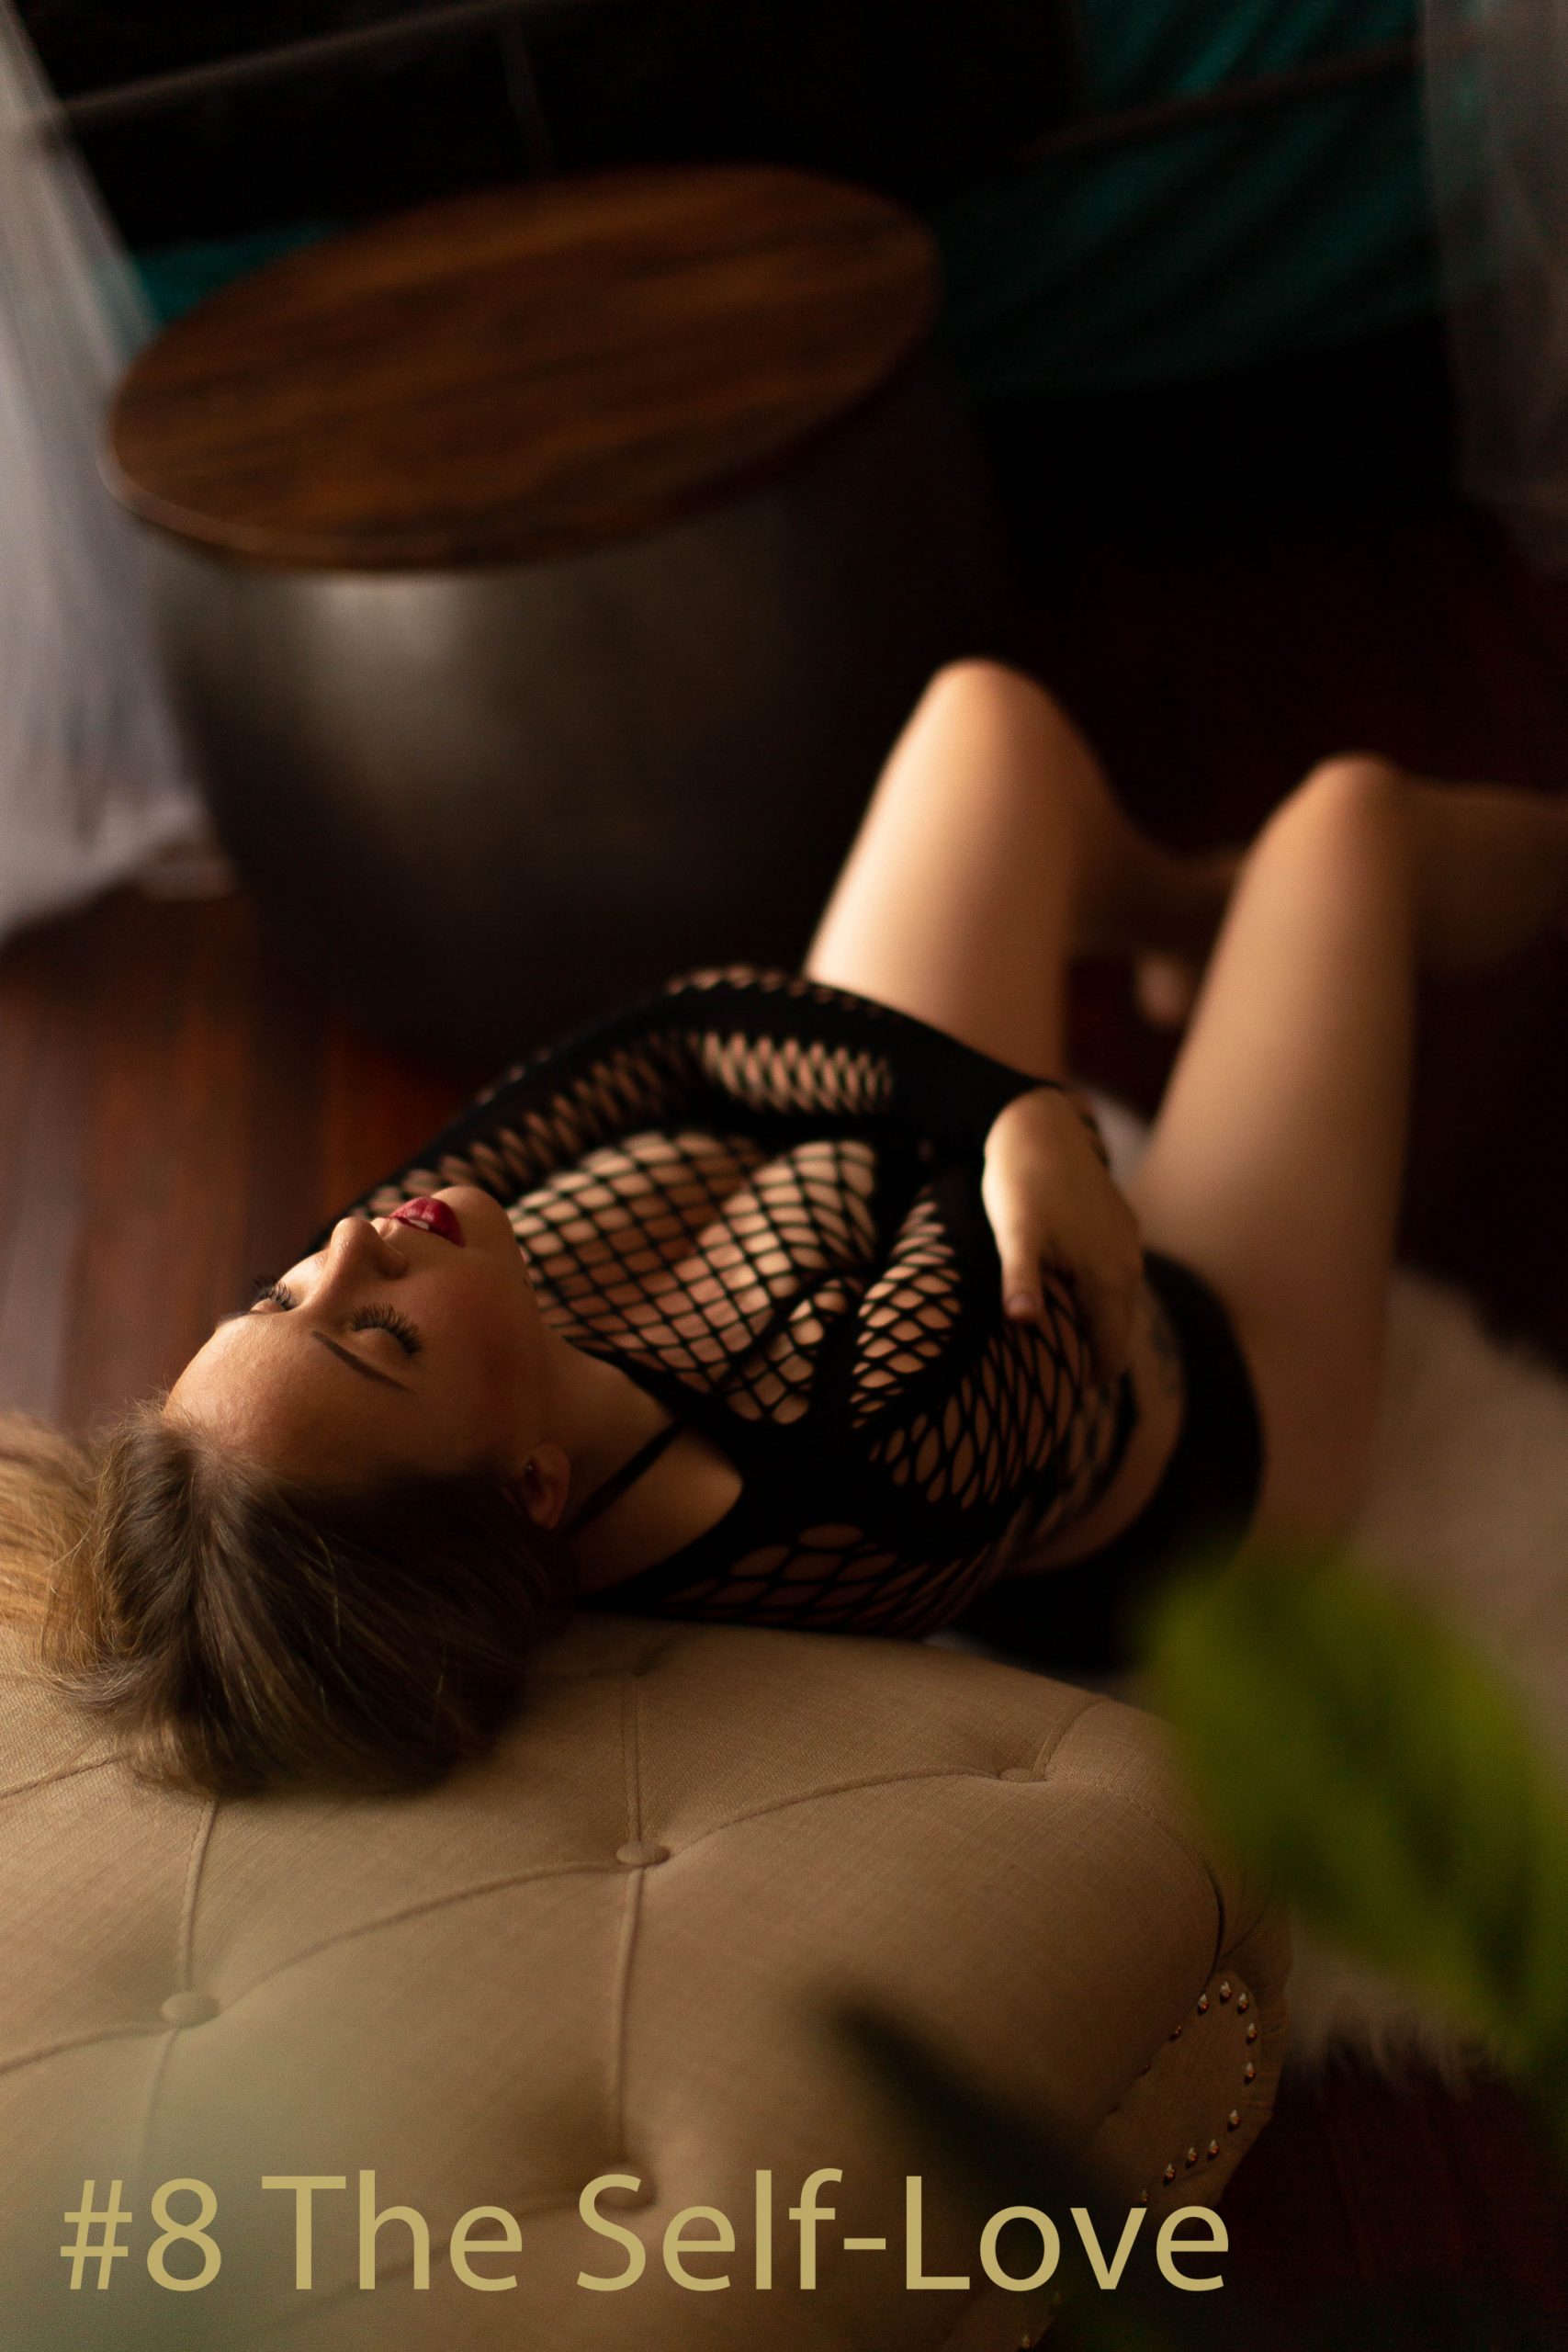
Remember that oh-so-sought-after side boob we mentioned? The Self-Love from a separate angle is also perfect to create cleavage if it doesn’t come as naturally to your client. Not only that, but this angle is particularly flattering to legs! This pose elongates your clients legs and slims them if the knees are posed as separated. Extra bonus on this pose if you align your client, camera, and light source perfectly to achieve a highlight and shadow contrast on both thighs and the neckline!
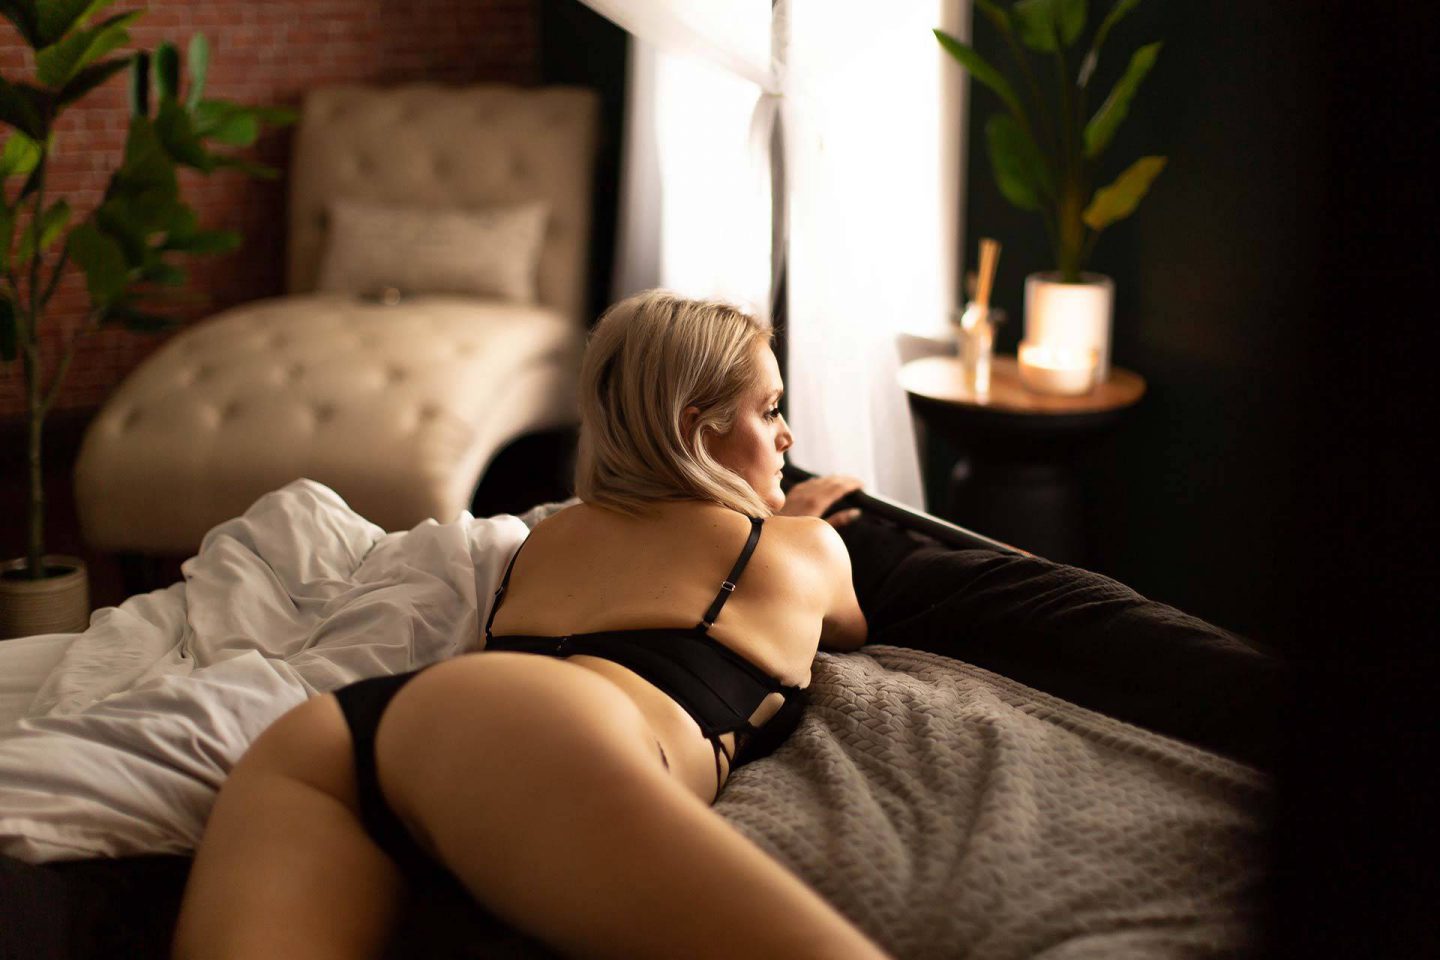
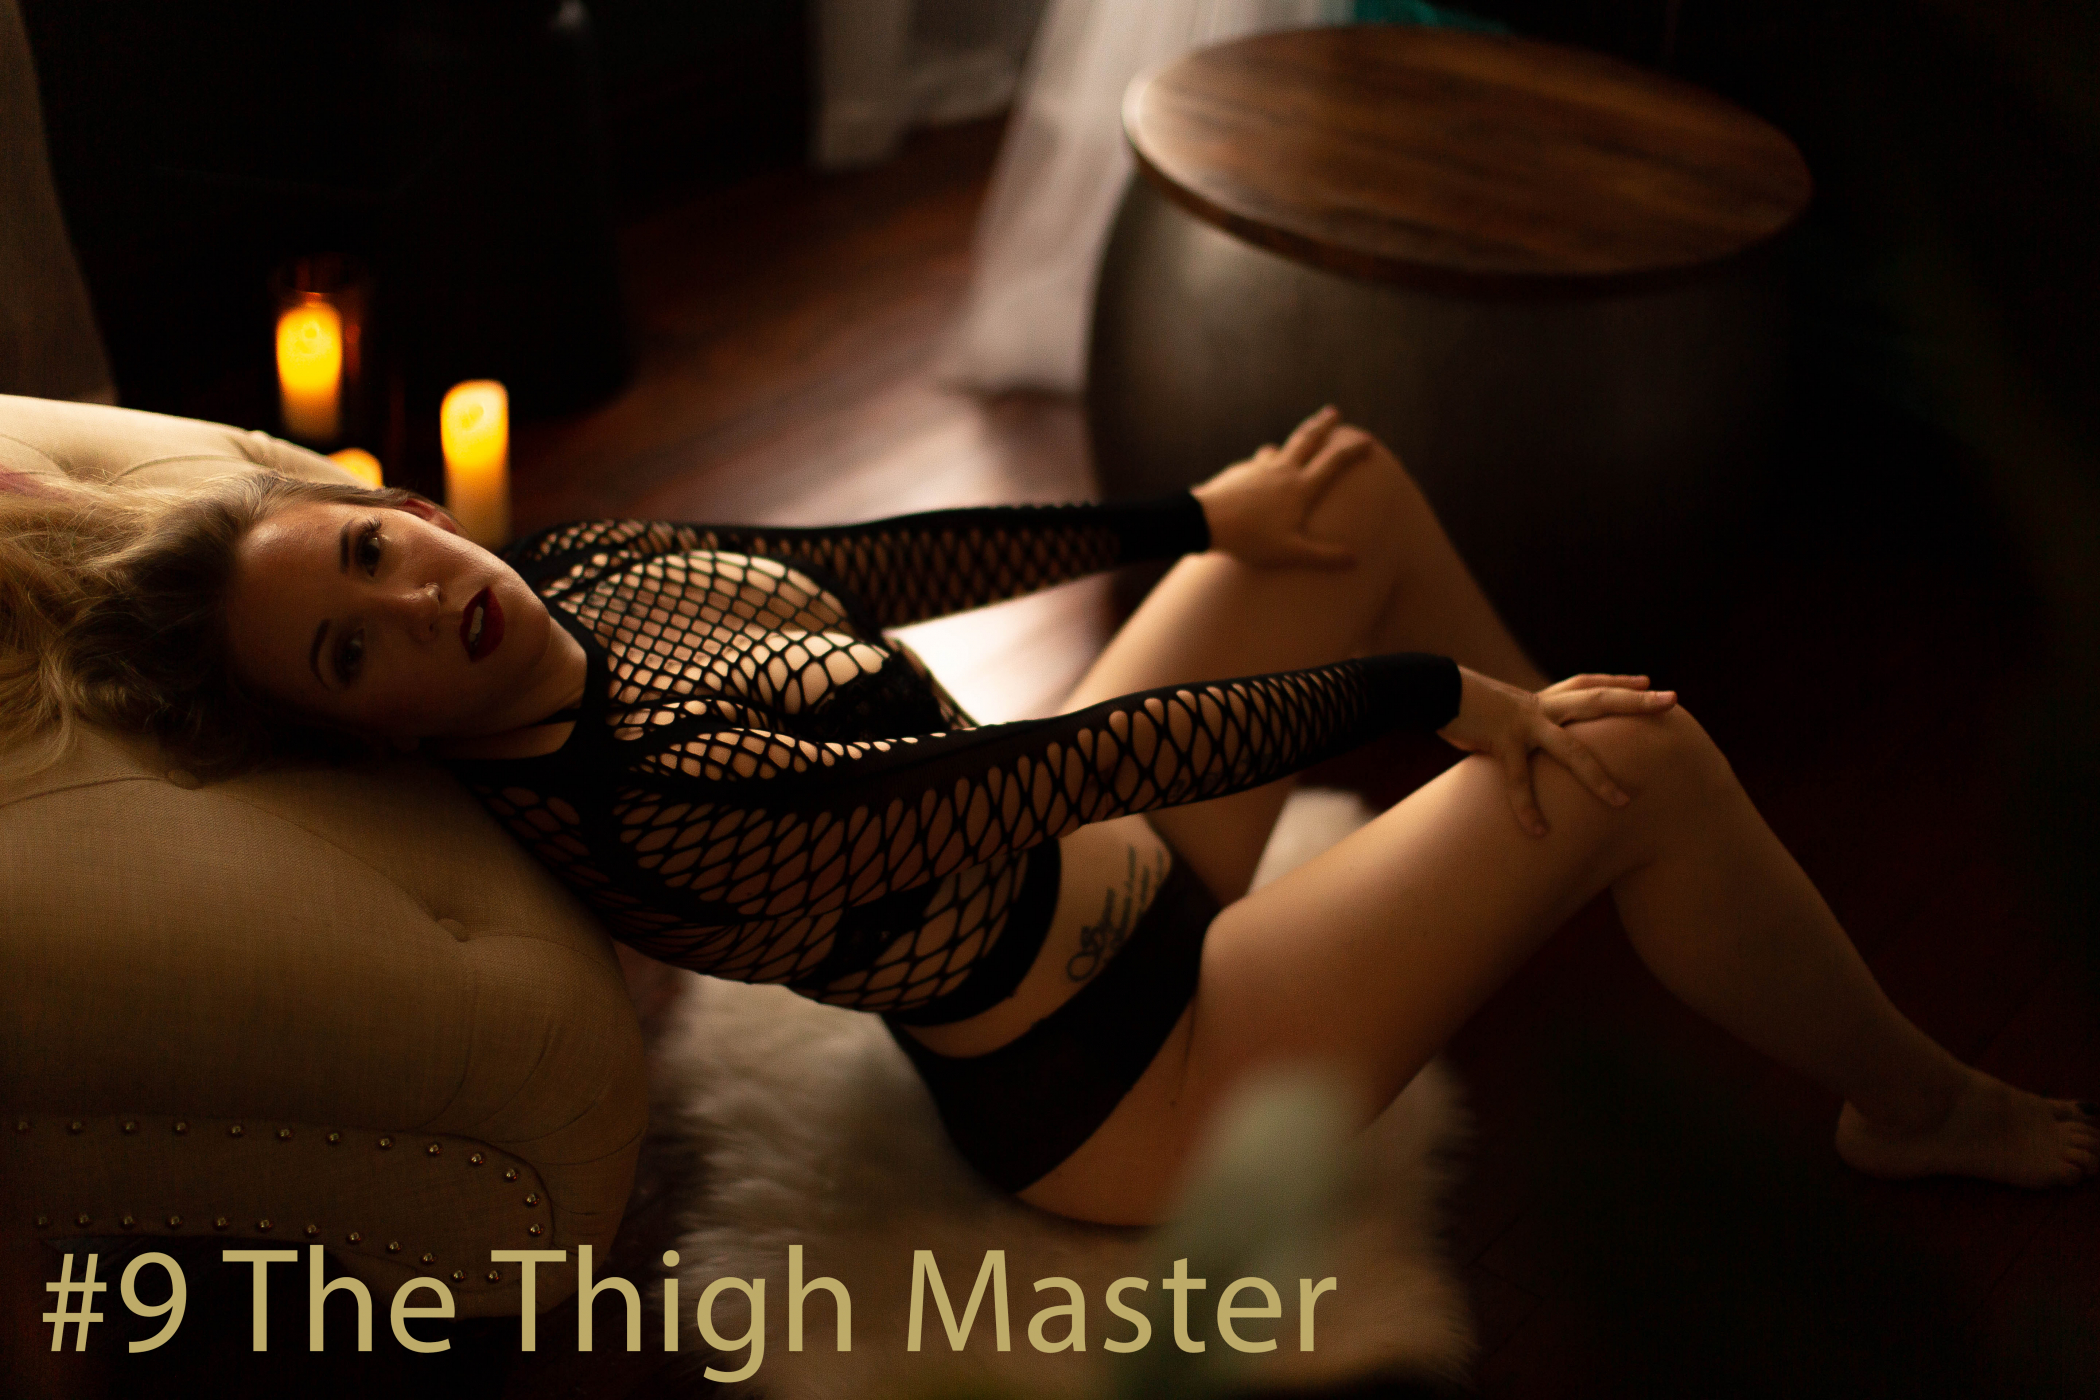
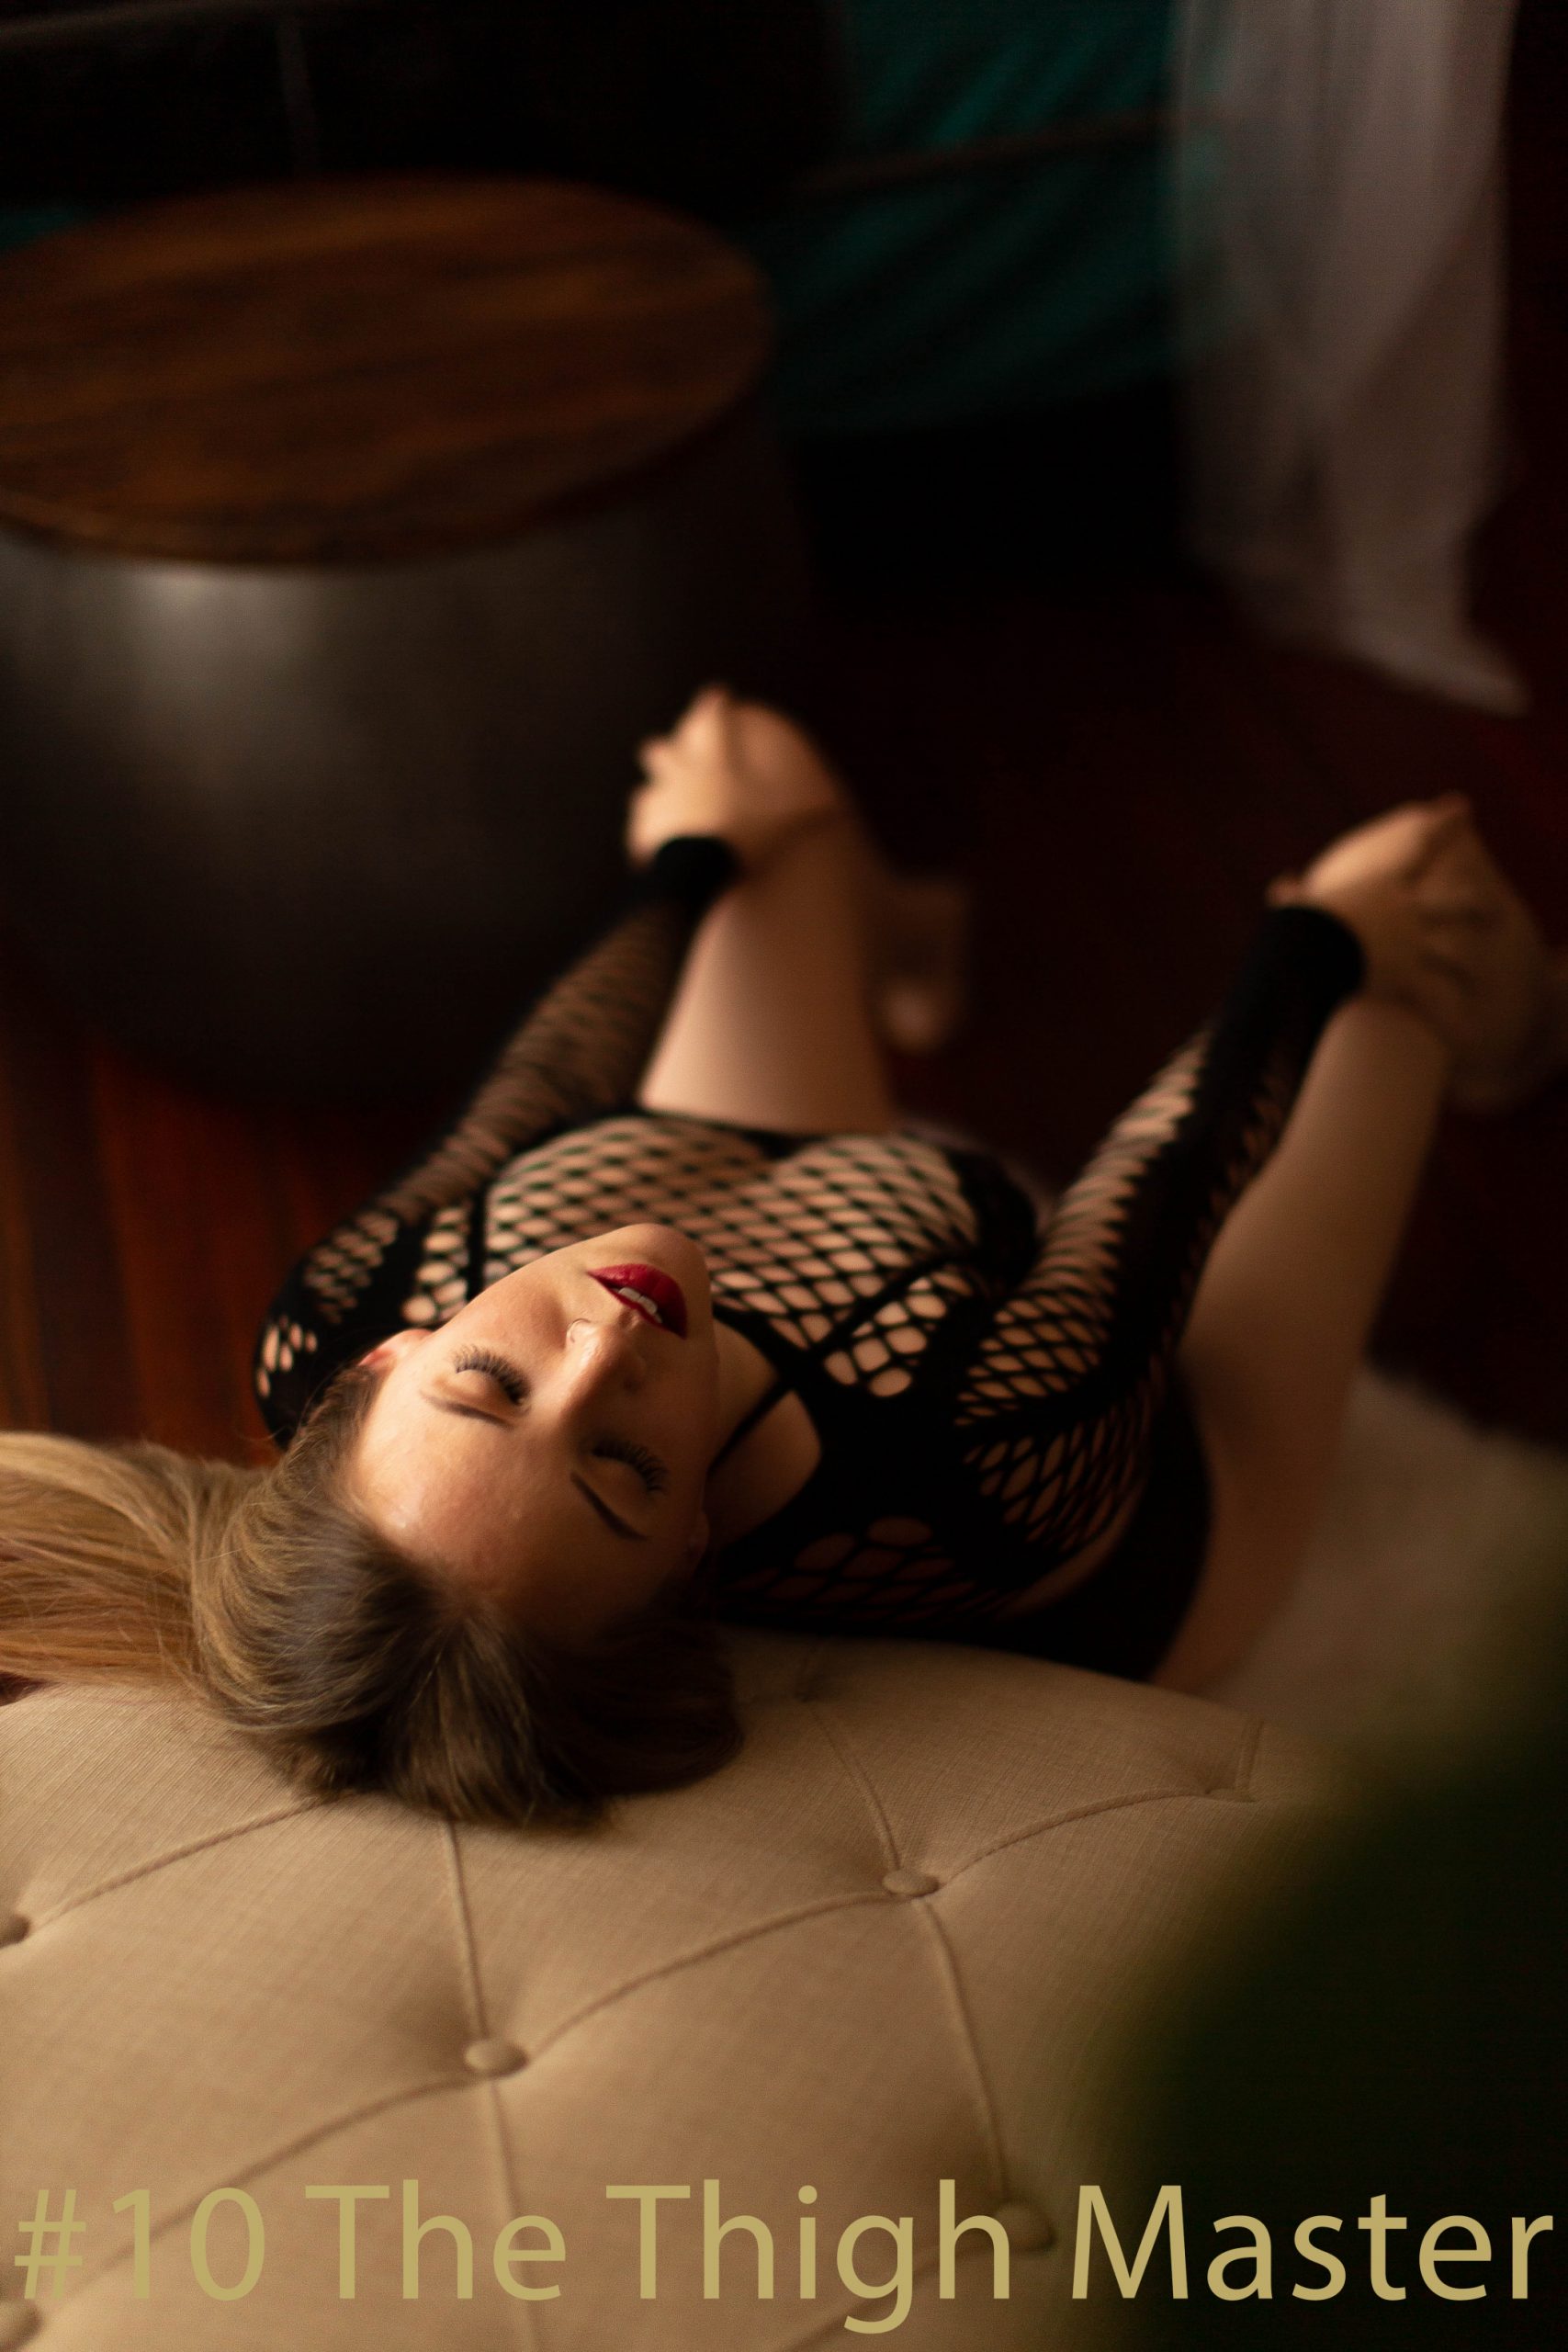
Boudoir Pose #9 The Thigh Master
Boudoir Pose #10 The Thigh Master
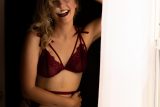
Boudoir Pose #11 Window to the Soul

Tell your client to “create a window” with her arms. This will give the illusion she is fully immersed in the moment. The window can reveal a glimpse of her face, or her entire face. This will depend on the angle you are shooting from and her hand placement. The further back your clients hands are in her hairline the less of her face you will achieve. Furthermore, if you shoot your client from above or below the window placement you will loose more of her face. If you shoot straight on you will be able to perfectly frame her face assuming she has proper hand placement.
The direction of your light source is especially crucial in achieving the desired window effect. You need to ensure light is still hitting enough of her face and is not blocked by her arm placement. Light can also be lost when you are shooting a straight line between you, your subject, and your light source. Normally this would create a silhouette. However, you will completely lose your subjects face if the arm placement does not allow for any light to seep through.
The best thing to keep in mind, the name of this pose is Window to the Soul, and the soul purpose of a window is to let in light!
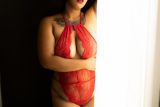
Boudoir Pose #12 The Window to the Soul

This is how we tell exciting image stories. Show a little more of your client than your previous image, show your subject from a different angle in the same pose to expose new parts of her body, have your client look directly into the camera lens for a final WOW moment. Finally, as always, make sure you get the perfectly placed highlight from your light source to excite the viewer (and most importantly, your subject!)
Boudoir Photographer Note:
For simplicity sake, and to show just how versatile one pose can be, we used the same lens (50 mm 1.2), same aperture 1.2, same shutter speed 1/320, and same ISO 320. We also used the exact same edit for every image, and popped the highlights, dropped the shadows, and warmed up the temperature for overall tone.
For more helpful information visit our Blog or read articles with more Boudoir tips such as What to Wear.